
So many parents think that teaching their children to count is easy peasy! They teach the name for the numbers, their kids learn to orally count to 10 and we think we made it. Then we watch our children go to count something, and it is usually them pointing to random objects (often repeatedly) as they say the numbers randomly. Sound familiar? No worries amigxs, that just means you need to work on 1:1 correspondence with your kiddos and help them evolve their understanding of numbers a little. It is a crucial phase in every child’s learning!
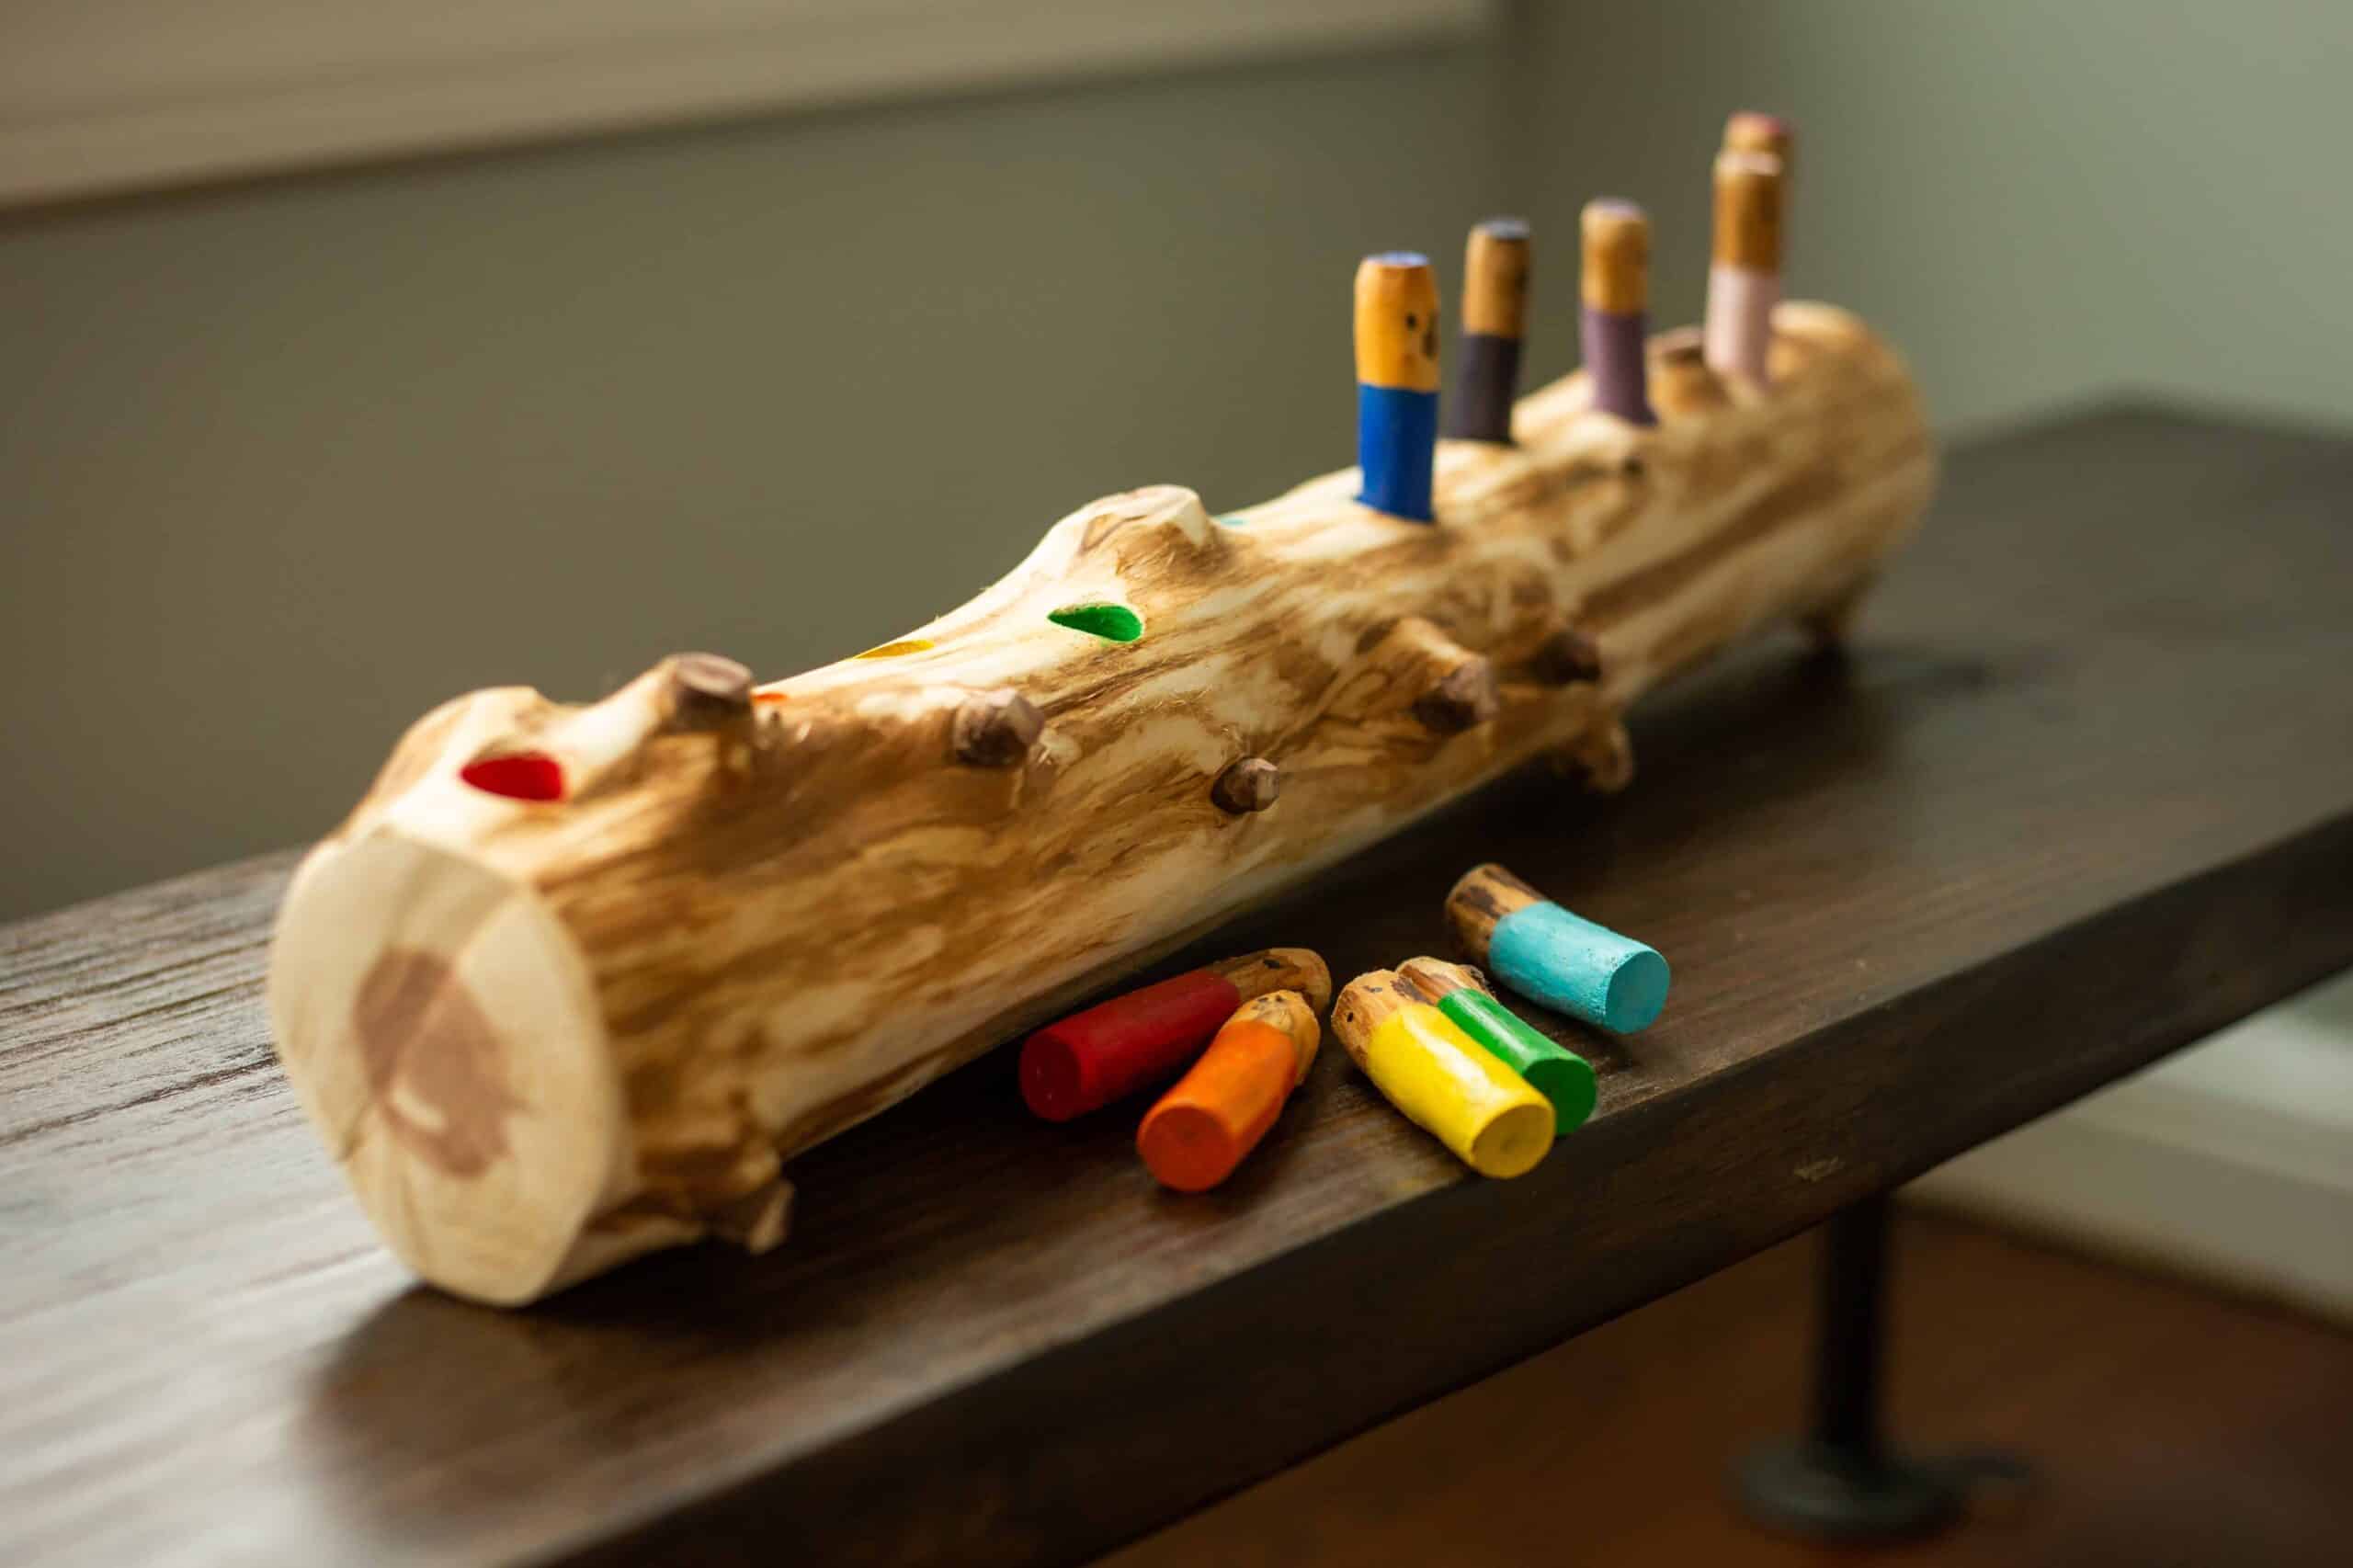
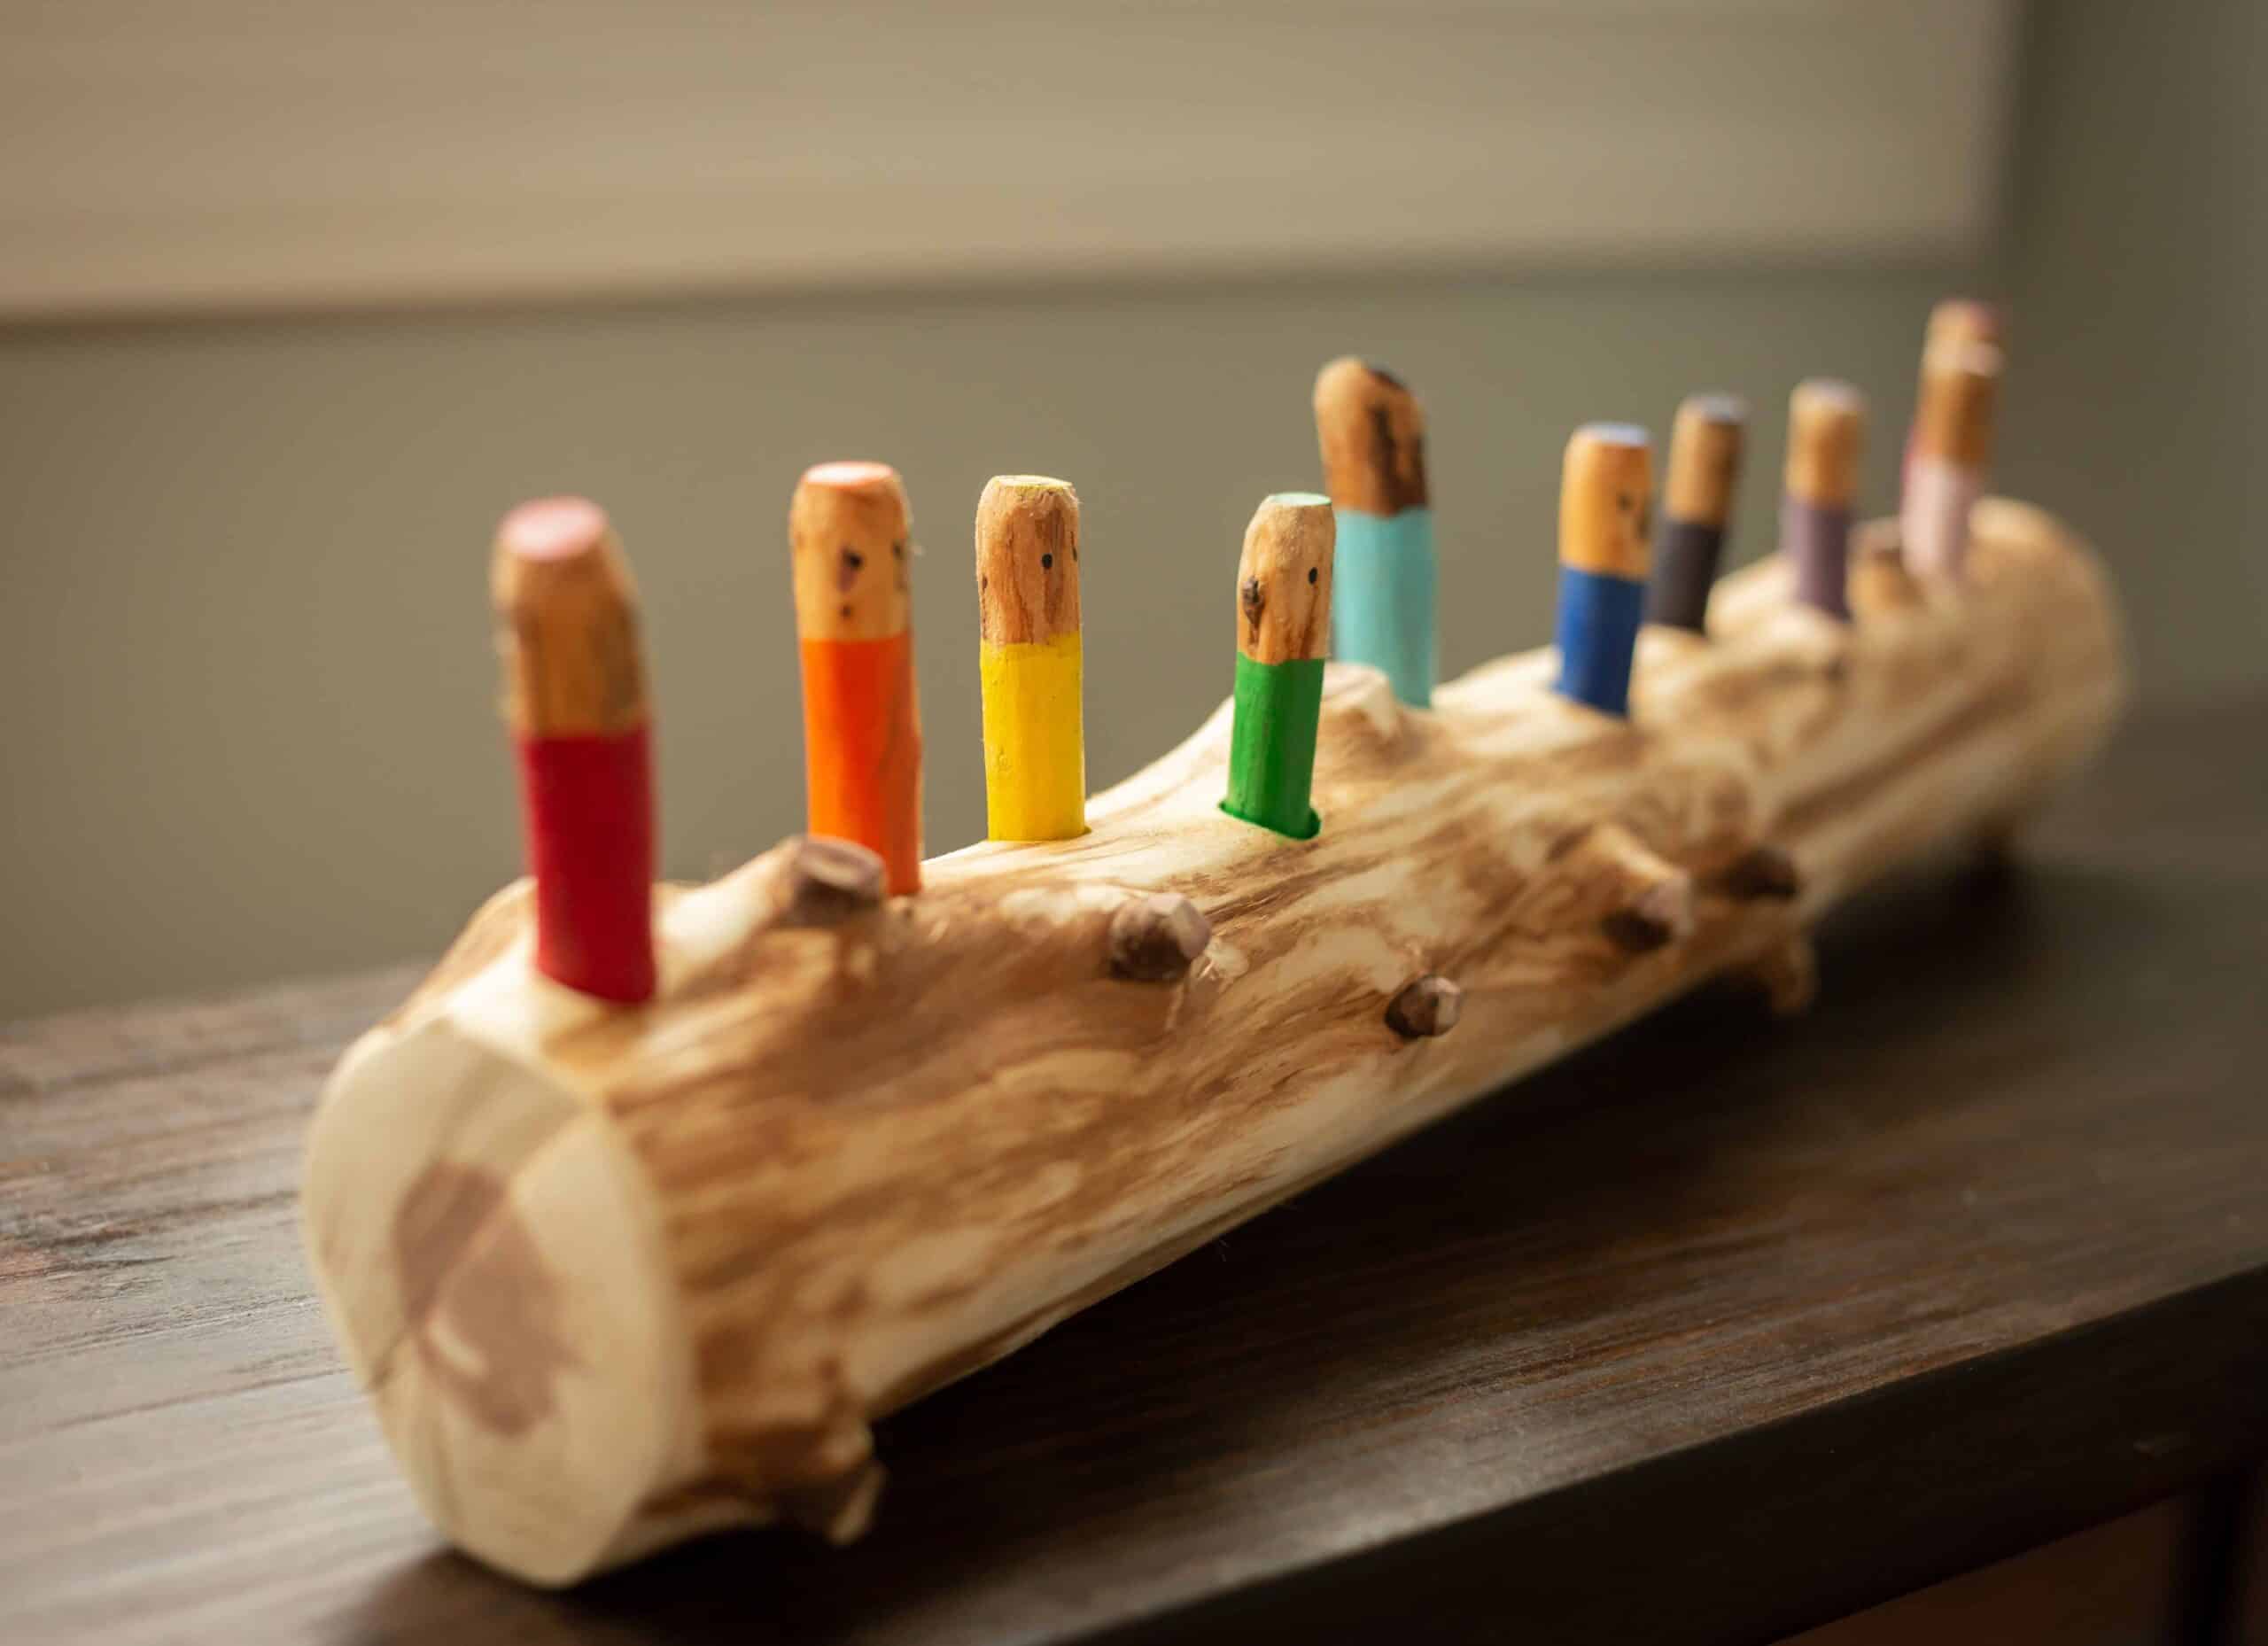
Don’t worry or feel overwhelmed by this, it can be done with fun and interactive activities! This DIY Gnome Counting Log was inspired by another project I made from the fall, the Mushroom Counting Log. My children have love that learning tool but I really wanted to make something to help them start working on their sequencing in an easier way.
By adding the color coding along with the written number, this lets my children not only work on their 1:1 correspondence but also their number sequencing. This was a quick and easy project to make that I know we will get so much use out of! It is also so much fun for imaginary play.
What you will need:
Saw
Drill
Forstner Bit (for cutting bigger holes in the log)
Acrylic Paint
Sticks for the little gnomes & a piece of a log or wood slice for their home.
To get started, find your base log (I just cut it from a dead tree in my back yard) but you can also use a nice wood slice for this! That would be cute. Then peel off the bark (unless you buy it) and sand the wood to make it smooth. Cut your pegs (again I just used sticks) and try to use something where they will all the the same or a similar size. Once cut, sand those too!
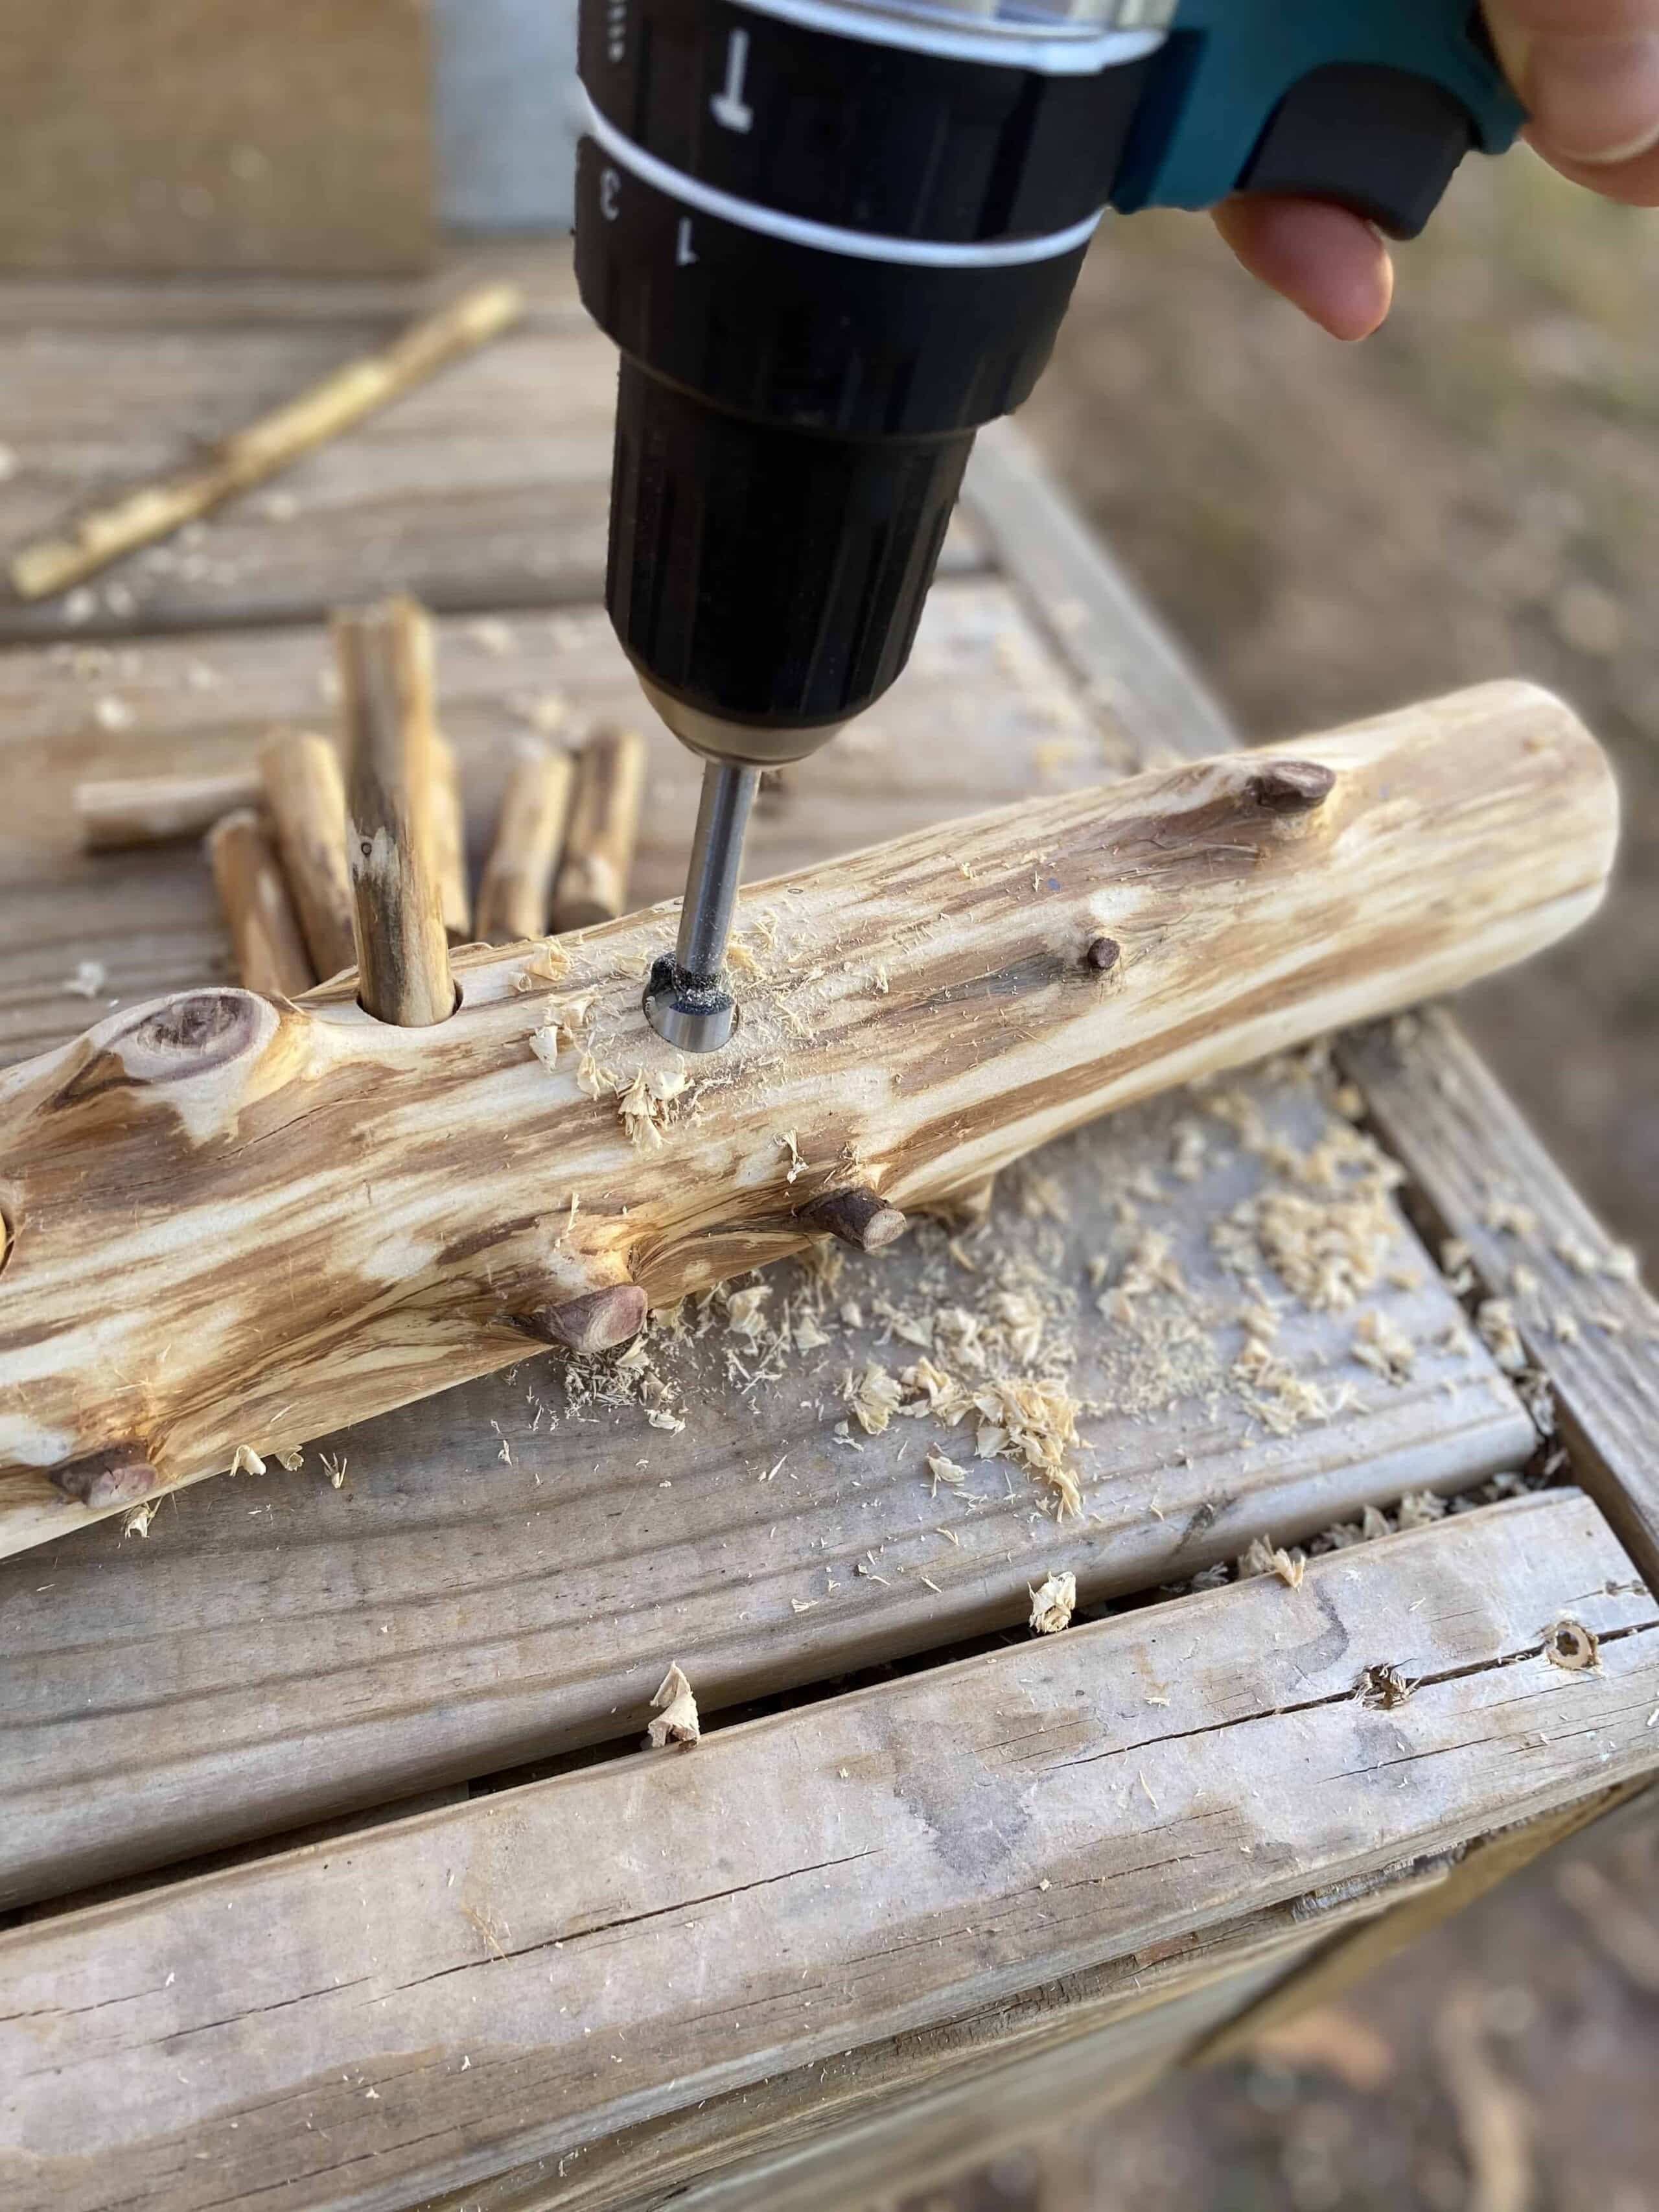
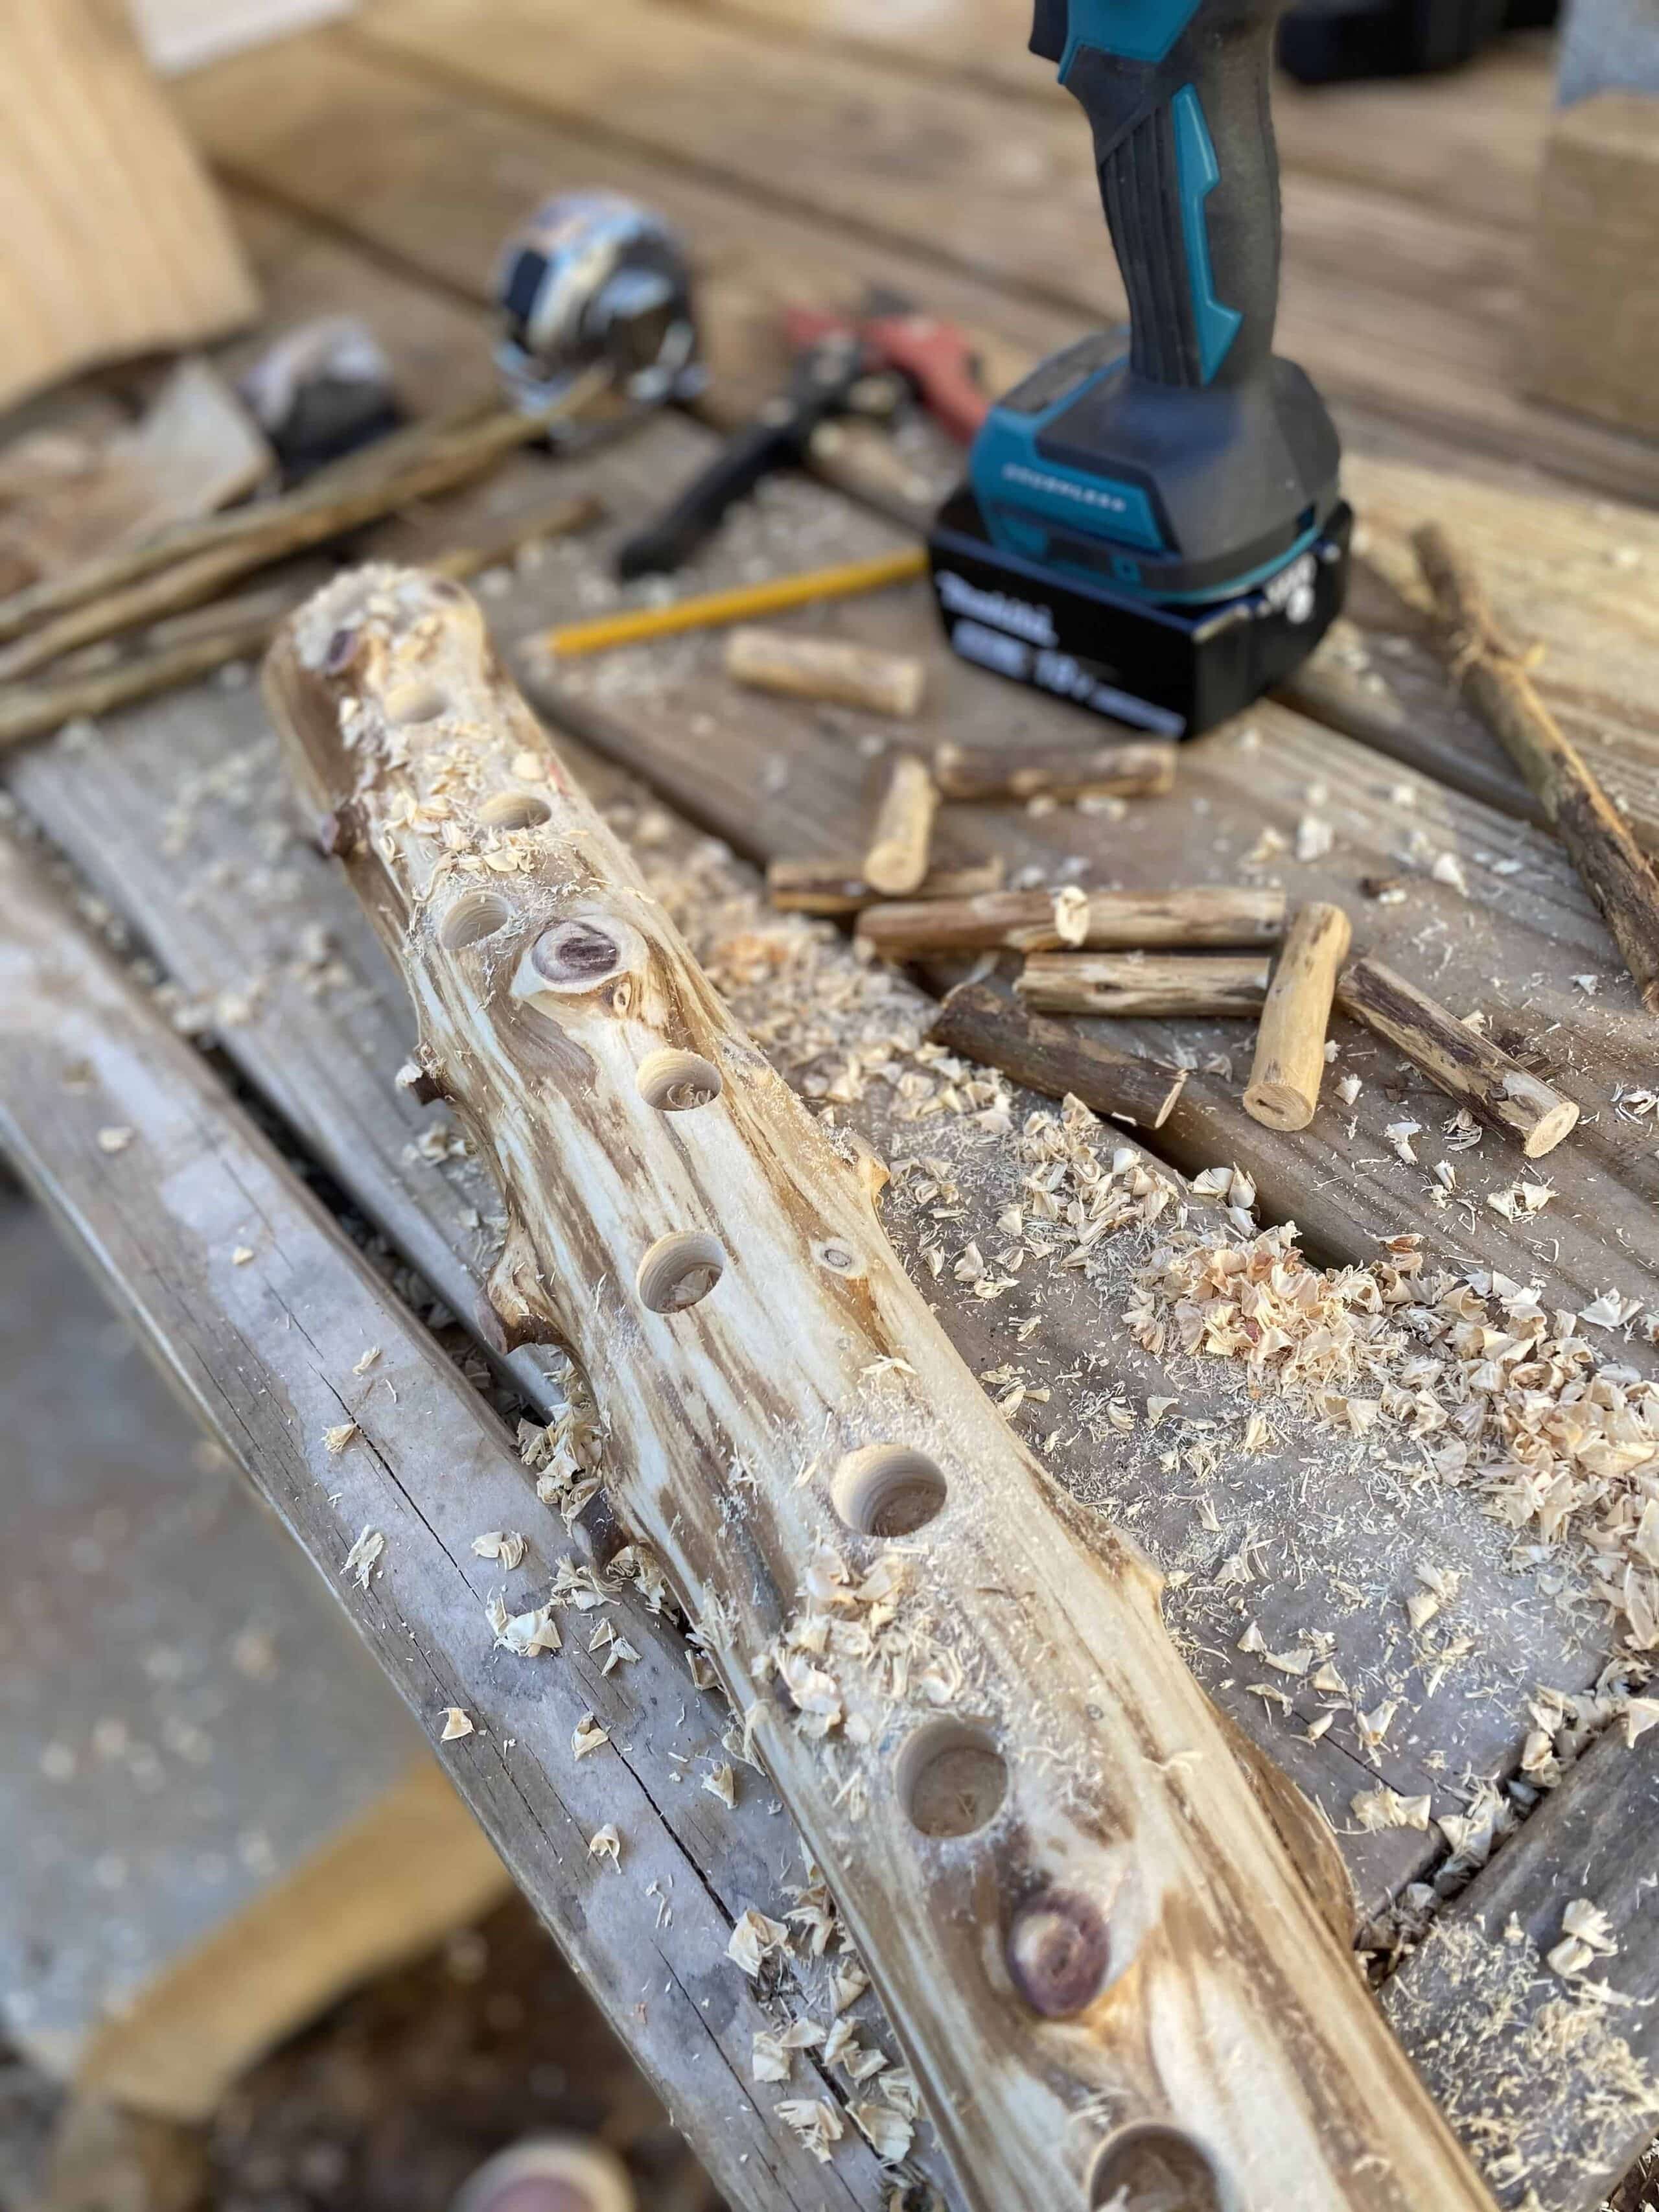
Now comes my favorite part. Mark where you want to have your little peg gnomes live in the log then take your forstner bit and test it on some scrap wood to make sure the pegs fit well. Now is the fun part where you use the forstner bit to cut shallow holes where each peg will sit. Use the drill bit as a guide for depth but you can make them any size and depth you want! If some pegs are slightly bigger than others then just wiggle your drill in circles as you work to make slightly bigger holes.
Now that you have your pegs cut and sanded and your holes drilled, it’s time to add some color to those little gnome pegs! I painted the base and just a little on top of each one. Then I added two eyes and I wrote the numbers on top with black paint. I just used acrylic paint but it could be fun to experiment with natural dyes too!
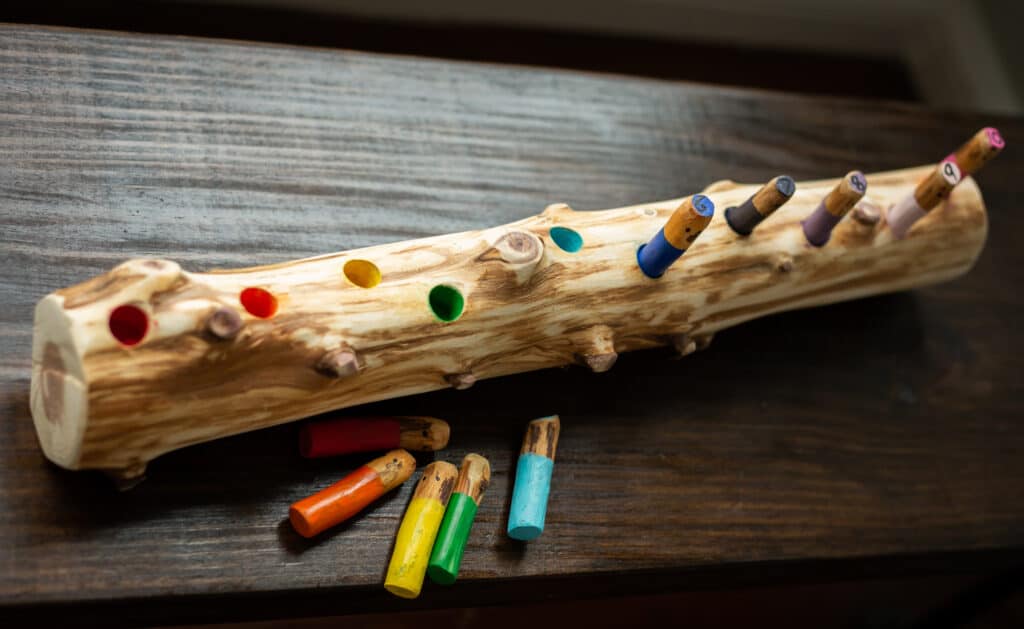
Let the paint dry, seal it with a thin coat and let dry for a full 24 hours before play. This can start as a color sorting activity, evolve to a 1:1 counting activity and then evolve to number sequencing work.


