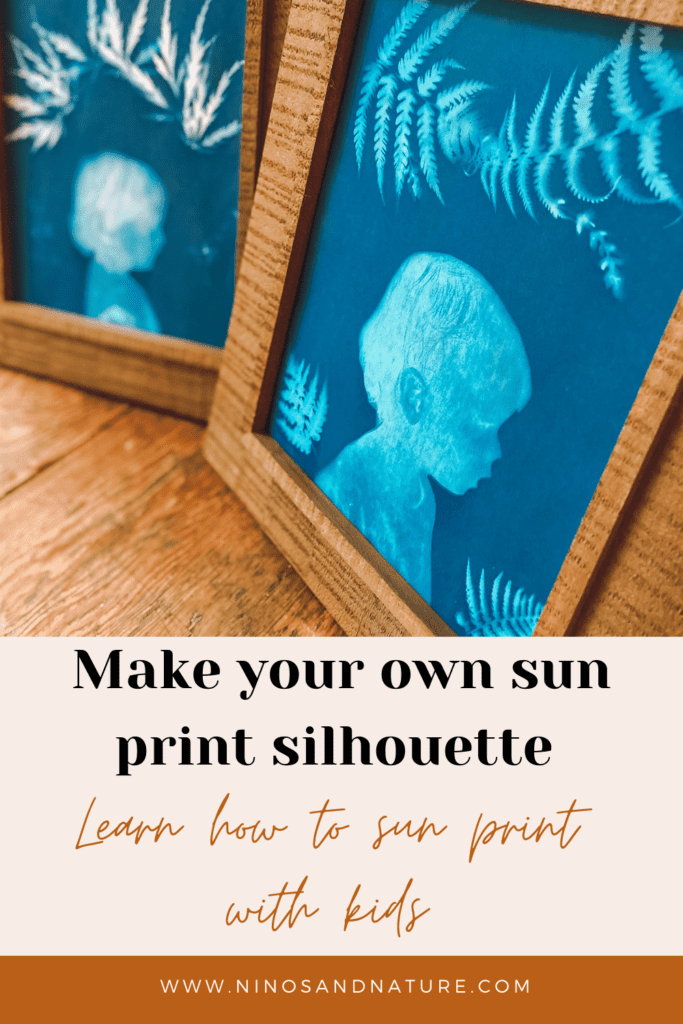

DIY Nature Sun Print Silhouette – Learn how to Sun Print with Kids
Y’all…it is so easy and looks incredible. The hardest part is having your child sit still long enough and in the correct position to take a picture. You want to be on their level and have a nice side view where you can see their sweet noses and the little indents of their lips, maybe even some curlicues! One of my girls was easy and I got the picture on the first try, the other one I probably ended up taking 20 pictures but I persisted and it was worth it!
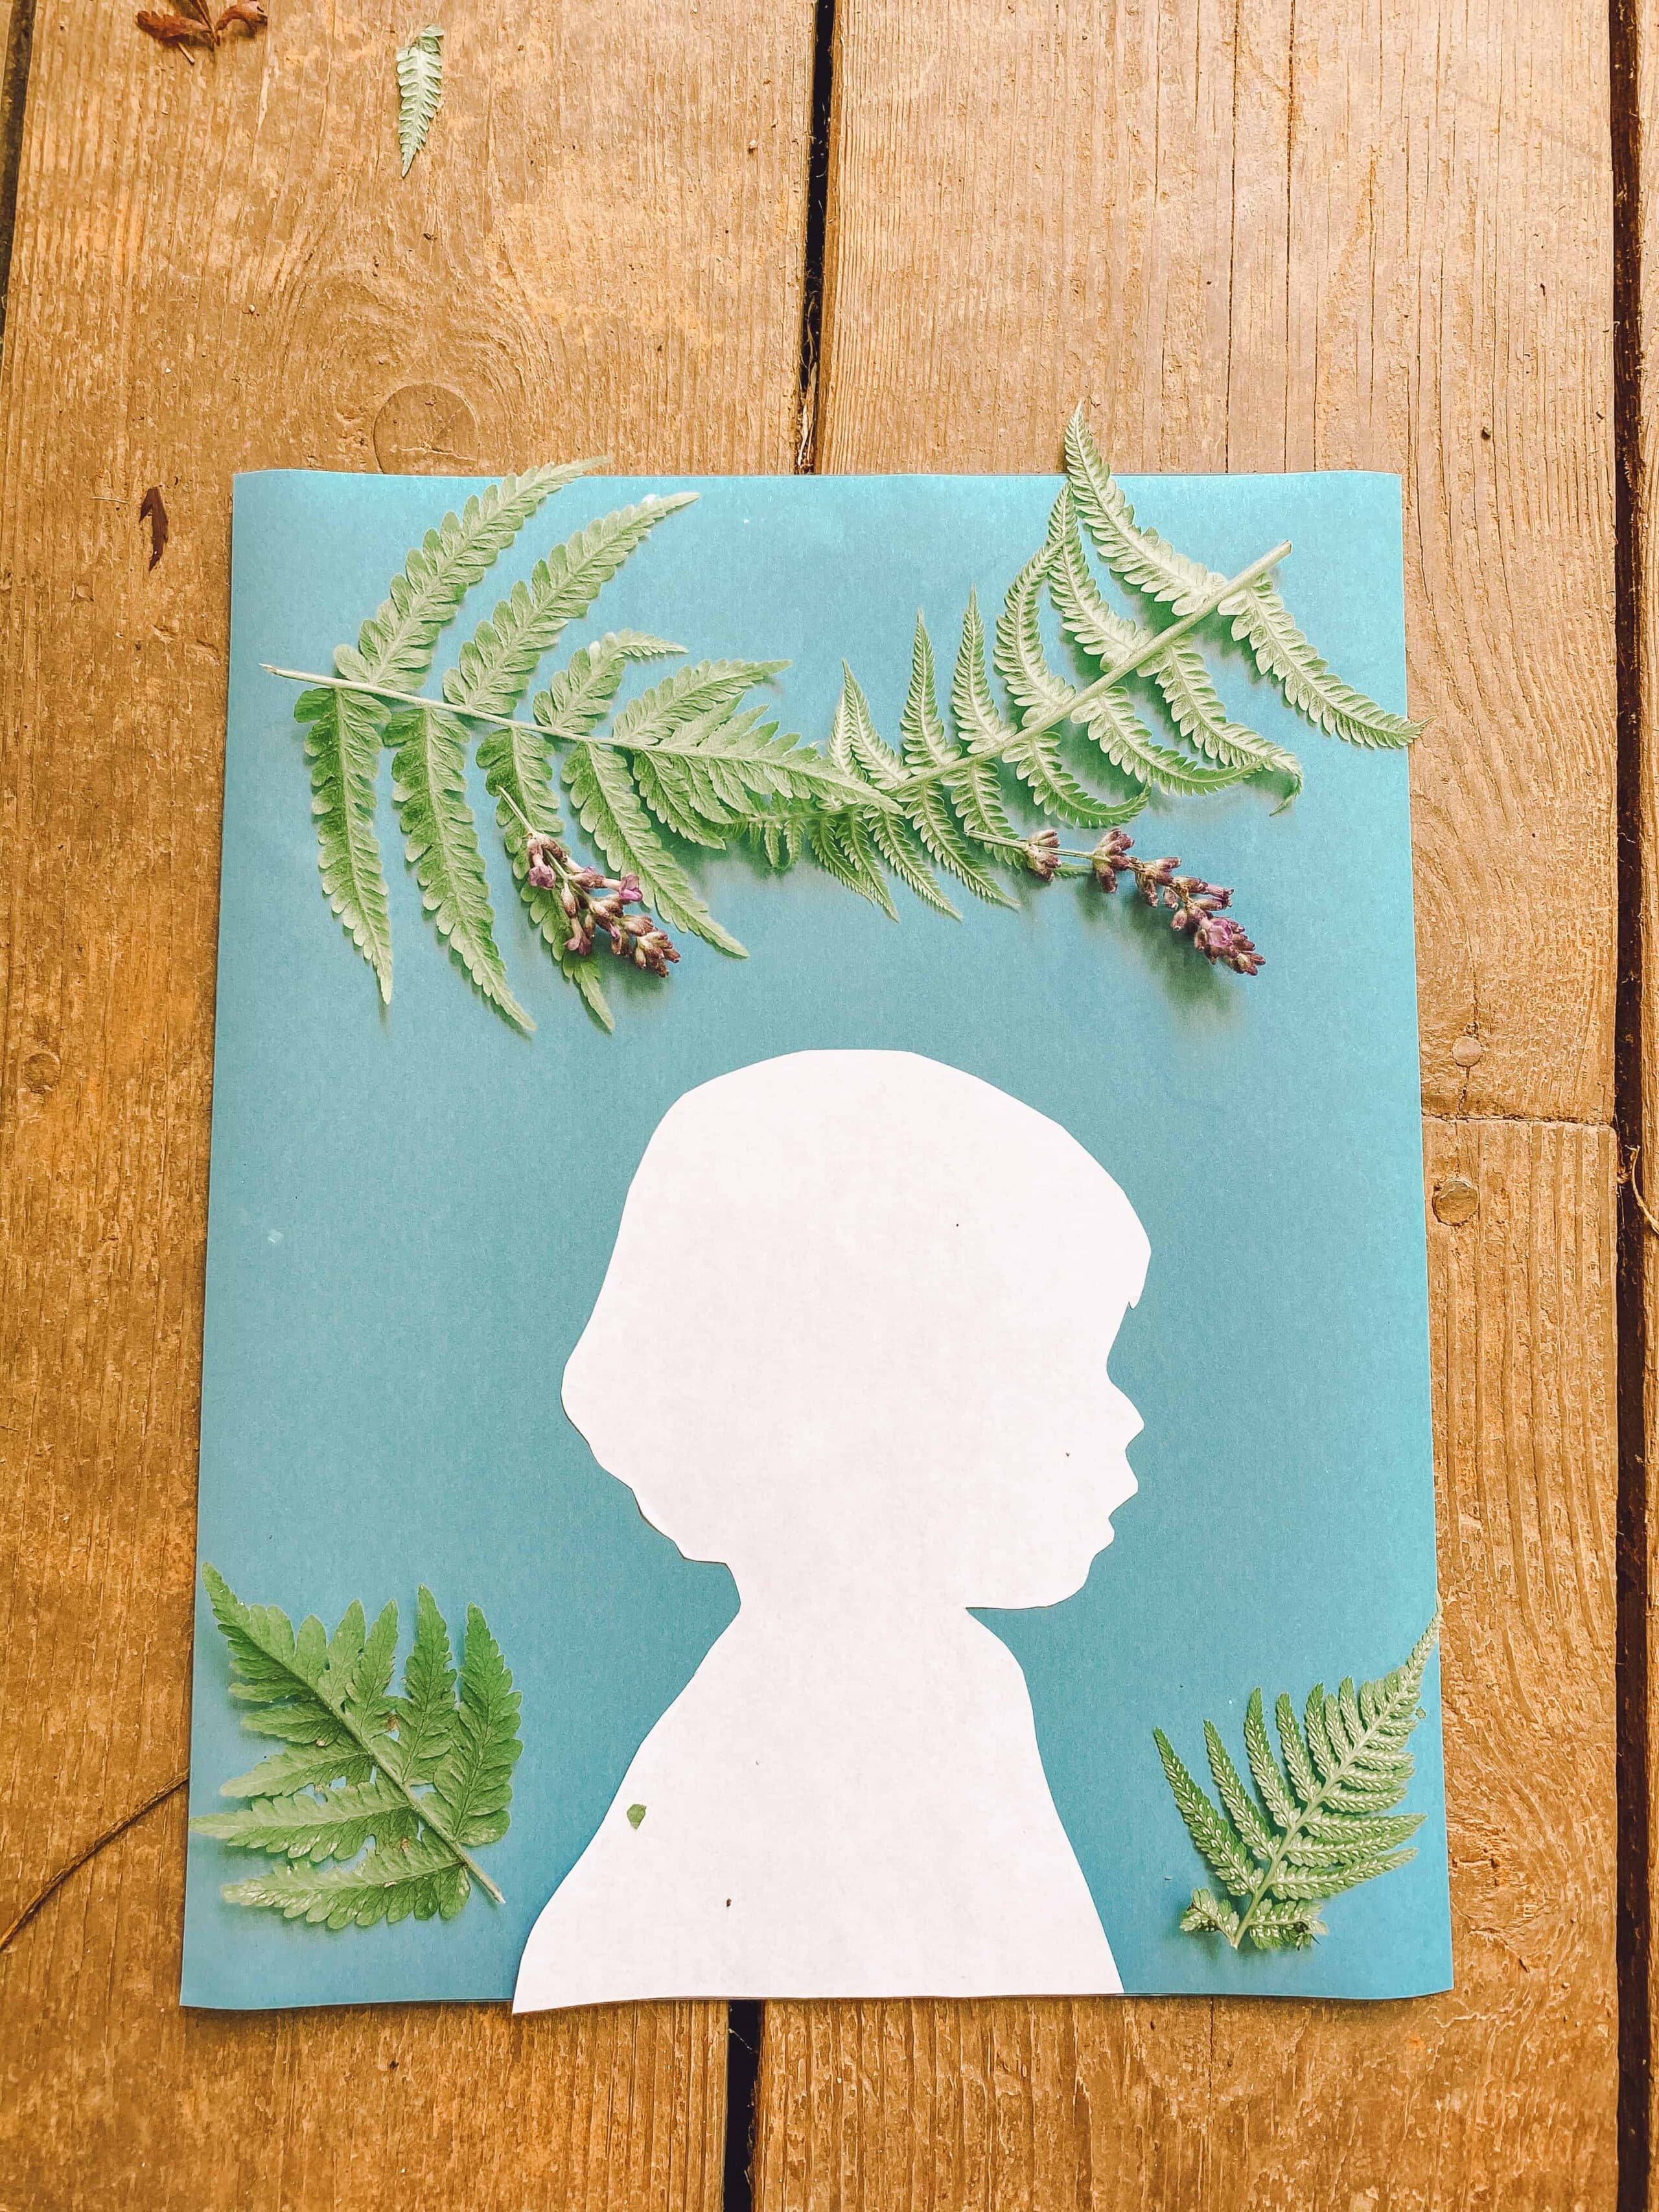
Here’s what you do. Print out the pictures (black and white is totally fine)- you may need to scale them down a little to fit whatever size sunpaper you have- just play around with it. Then as carefully as you can, cut out all around the picture pay attention to each little curve. Voila! Turn it over and you can see what the shadow will look like- adjust as needed.
Now for the magic. Collect any natural objects that you think would cast a beautiful shadow. I went with maple leaves, ferns, lavender flowers…gather anything that catches your eye and think about negative space. In a shaded area outside, take out a piece of sunpaper and put the profile picture face down wherever you would like it to be (I liked mine centered at the bottom of the page). Take your natural objects and arrange them however you would like! There are no rules here just make sure you aren’t exposing the paper to direct sun until you are ready.
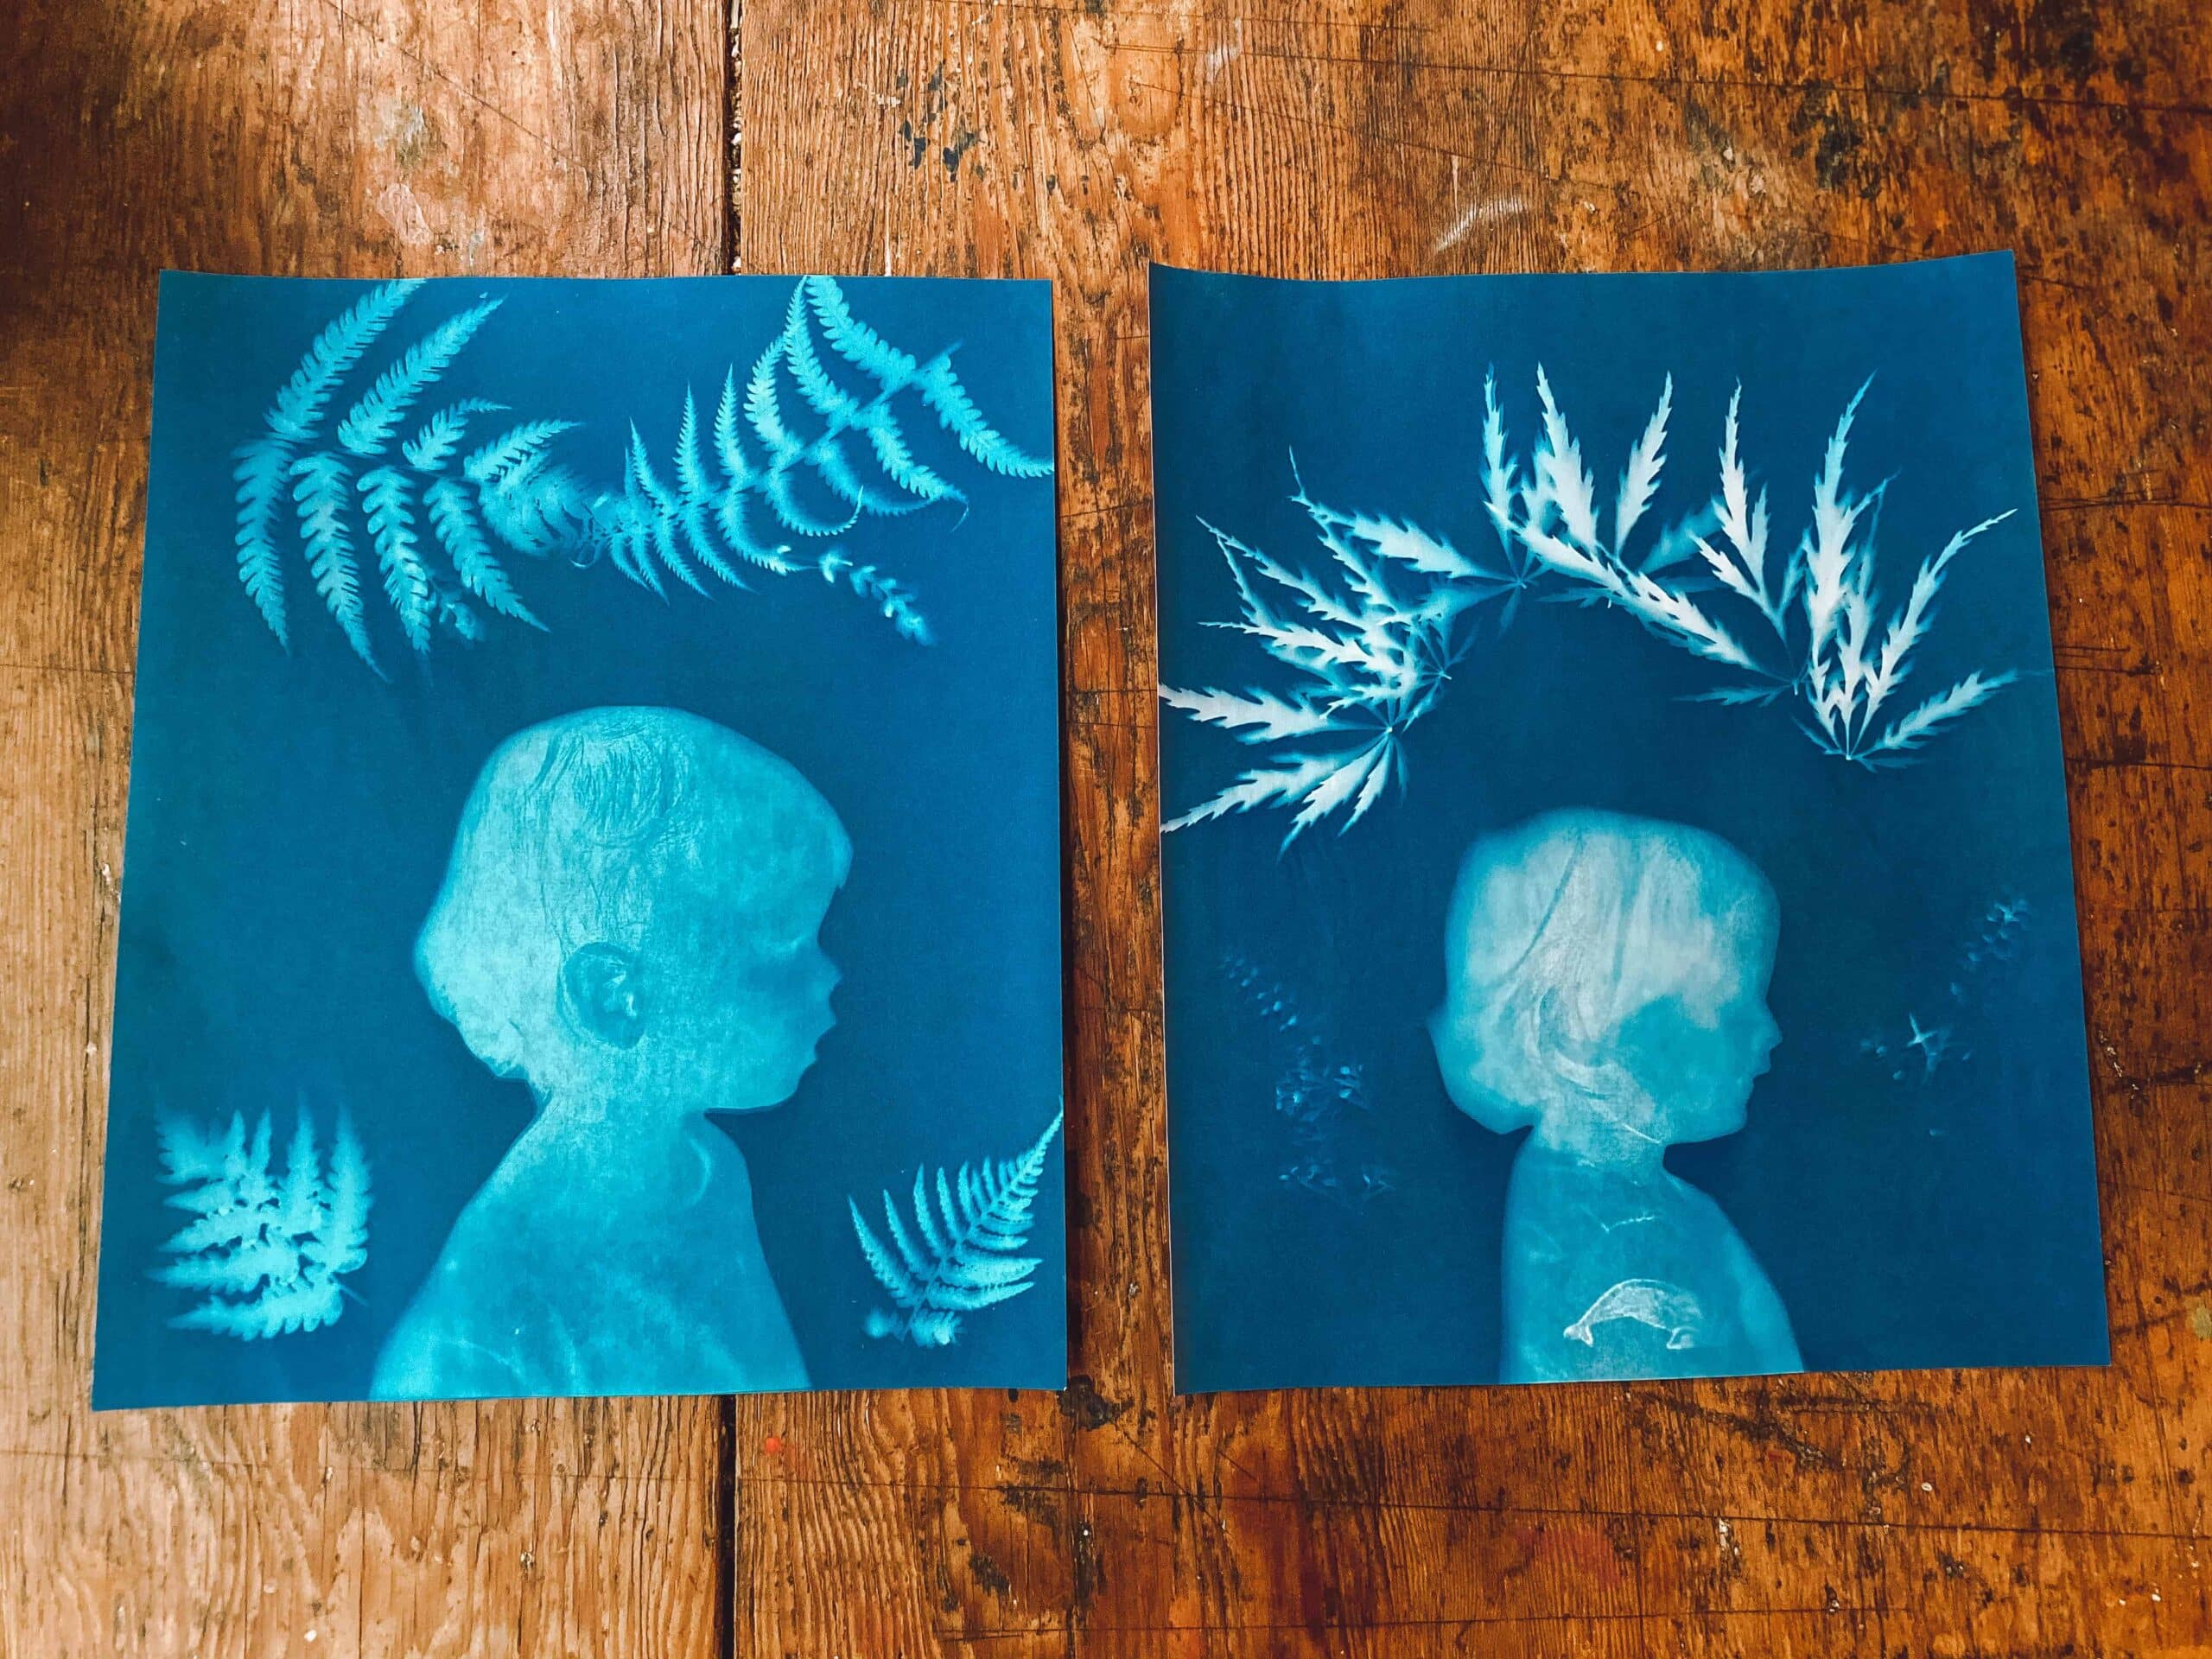
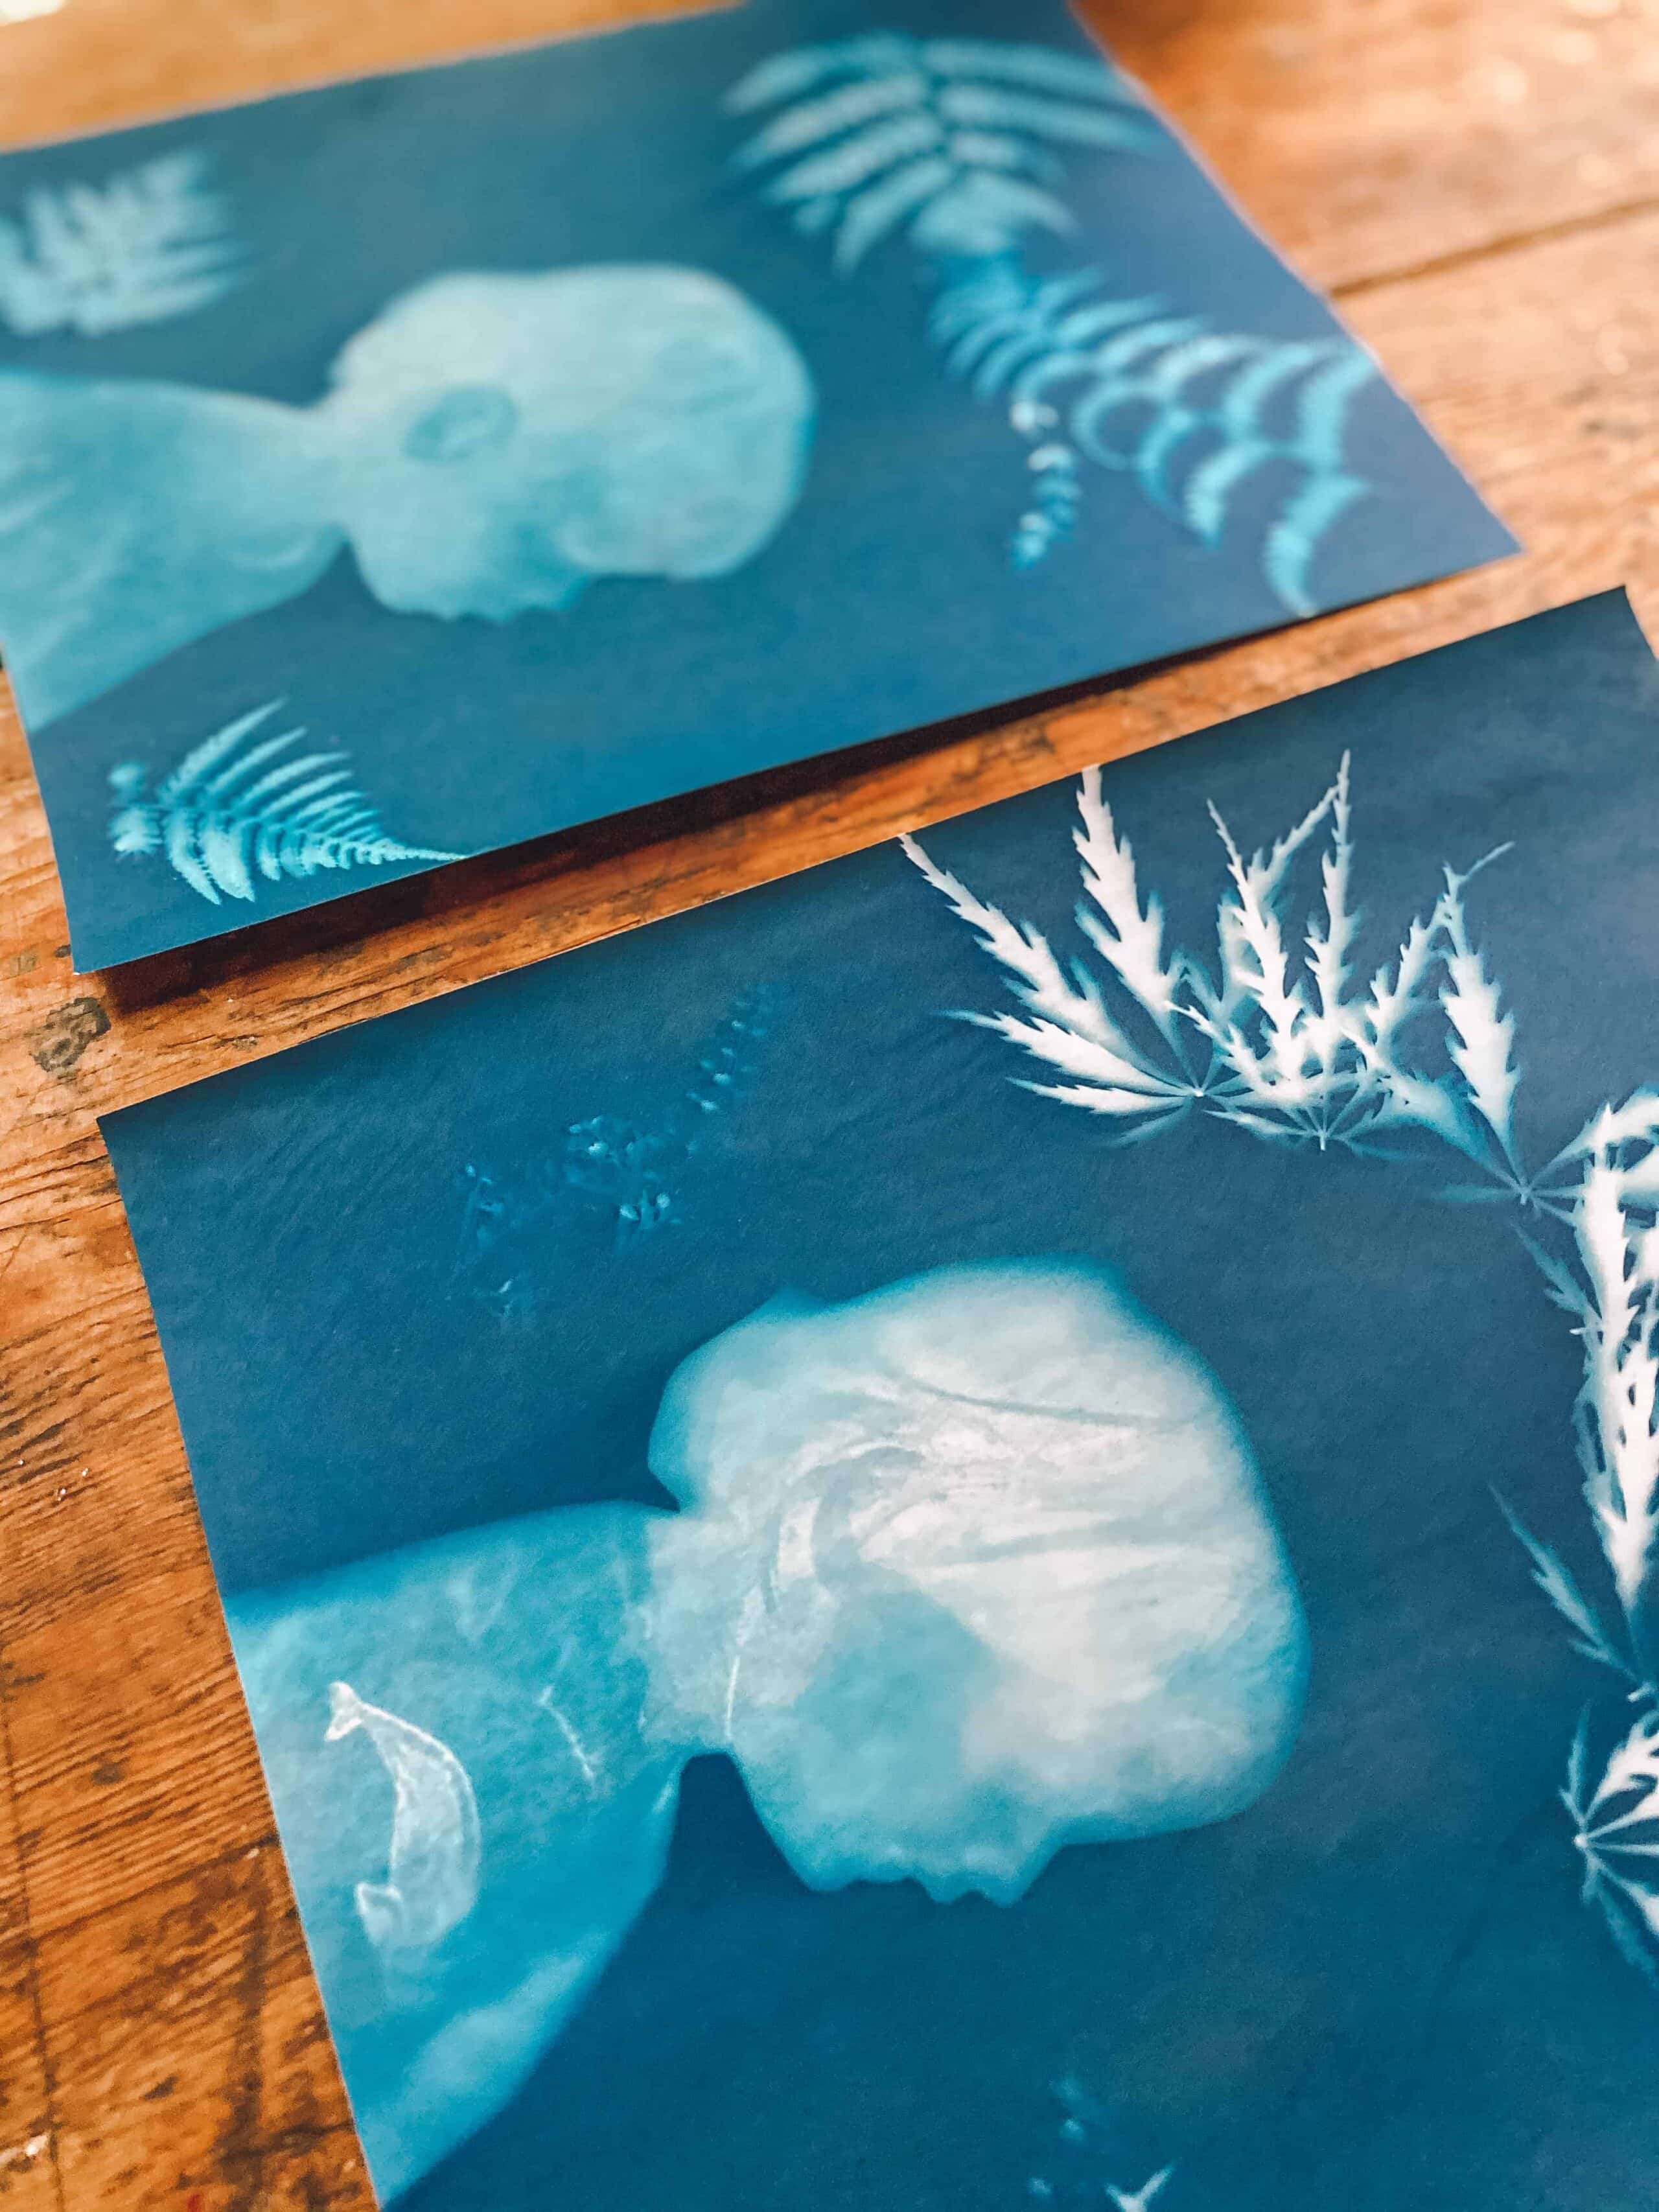

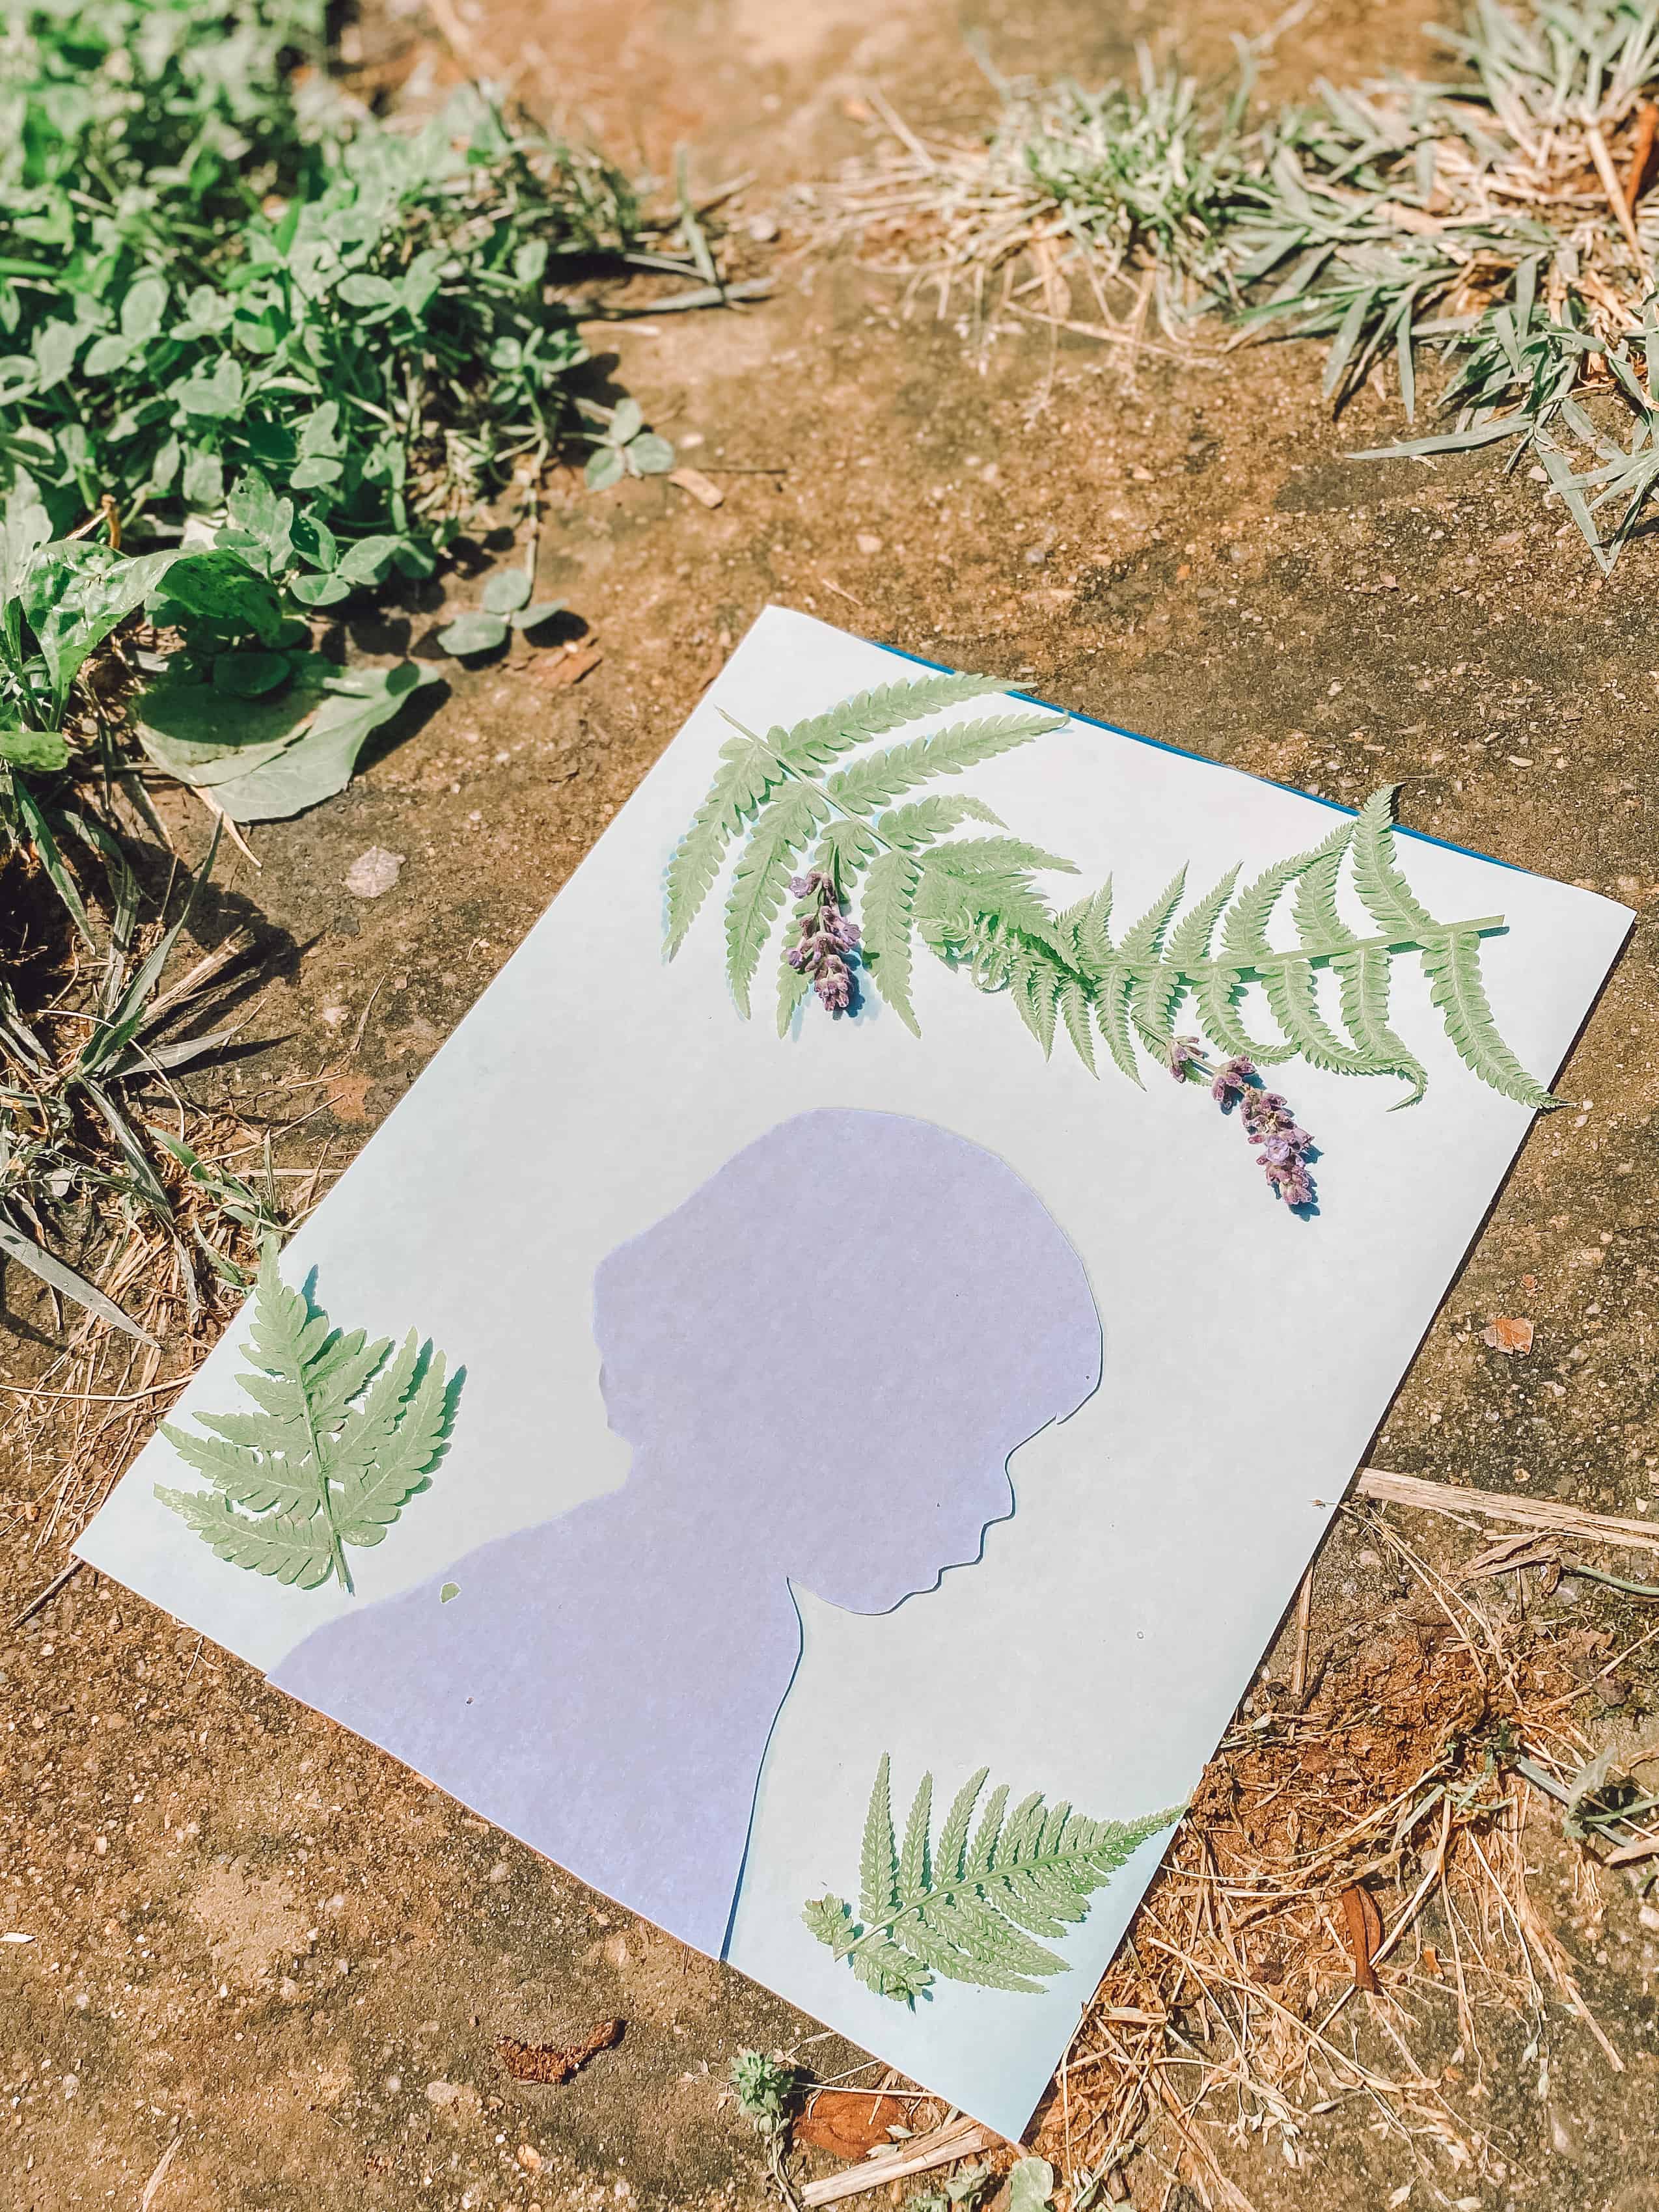
Ever so carefully, whenever you are ready, move your image (with everything resting and balancing on top) into the direct sun and set it down gently! It can take anywhere from 1-5 minutes for the paper to fully expose- you should see it shift from blue to white. AHHHH!!! Magic moment! Lift the paper, letting everything slide off and see the beginning of your print. Rinse it for 1-2 minutes in cool water to set the colors and let it dry (I think it says on the directions in between a book, I did it on a towel for the initial water to dry then pressed it in a book) for 1 day. They turn out SO lovely! They will stay like this forever – once fully rinsed and set the image should never fade. I hope you enjoy this special keepsake as much as we do.
Materials you will need:
*Sun Paper
* You can also print out the picture of your child on this special film paper to get the full detail!