I have had this special moon phase mold sitting in a closet for months and it wasn’t until I saw @cheritabita use it to make her special beeswax moon phases that I finally had the courage and the inspiration to make one myself! Even thought I am super type A and a bit of a control freak…I really wanted my three-year-olds to help me, so I took a deep breath and let go of perfection with these. I encourage you to do the same! These are magical all on their own, they don’t need to be perfect, and actually I think the memory of your children helping will make them even more beautiful in your eyes.
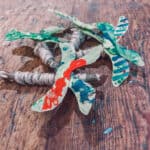
We melted our beeswax in our handy-dandy beeswax saucepan. If you don’t have one on hand, I recommend getting a junky old thing you can use to melt wax in. It makes it so easy and the best part is that you don’t need to clean it! Just leave the unused wax and it will harden to be used next time. As the wax melted, I showed the girls the dried flowers we would be using. Some came from my dried wedding bouquet still hanging above my desk, some from our summer spent frolicking in fields of wild flowers, some I just found in an old book and I have no idea where they came from. If you don’t have any dried flowers you can actually dry your own in a microwave (if you have one) or use other nature treasures. Pine needles, bits of tree bark, moss…anything can make this magical, even shredded paper or glitter!
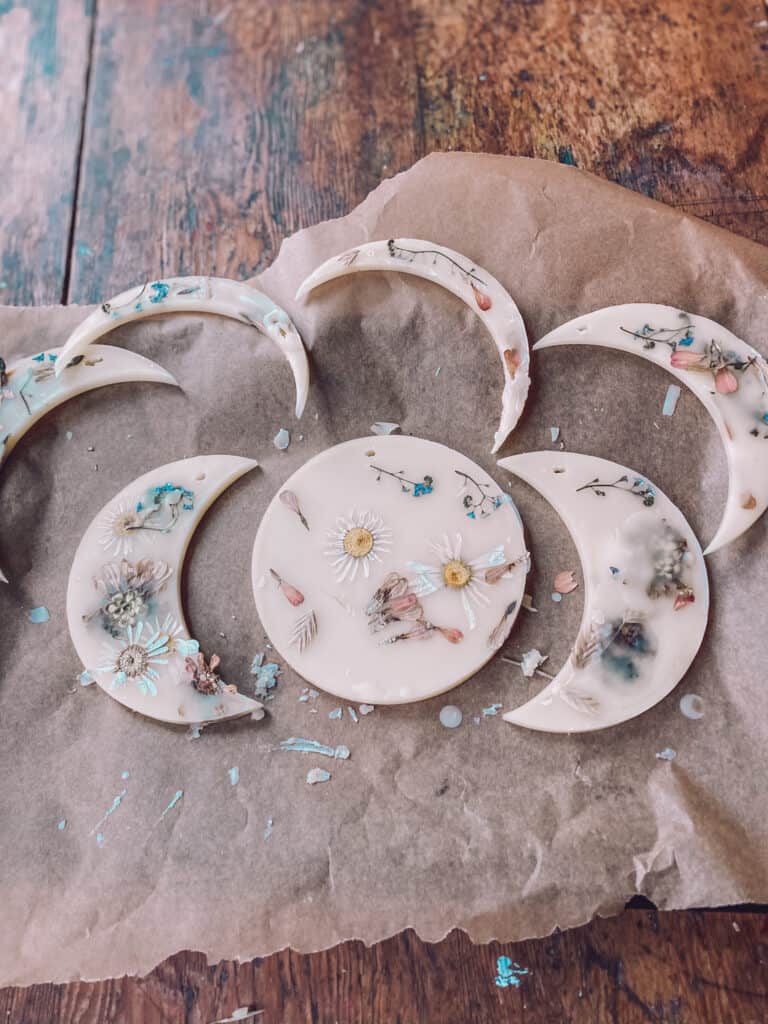
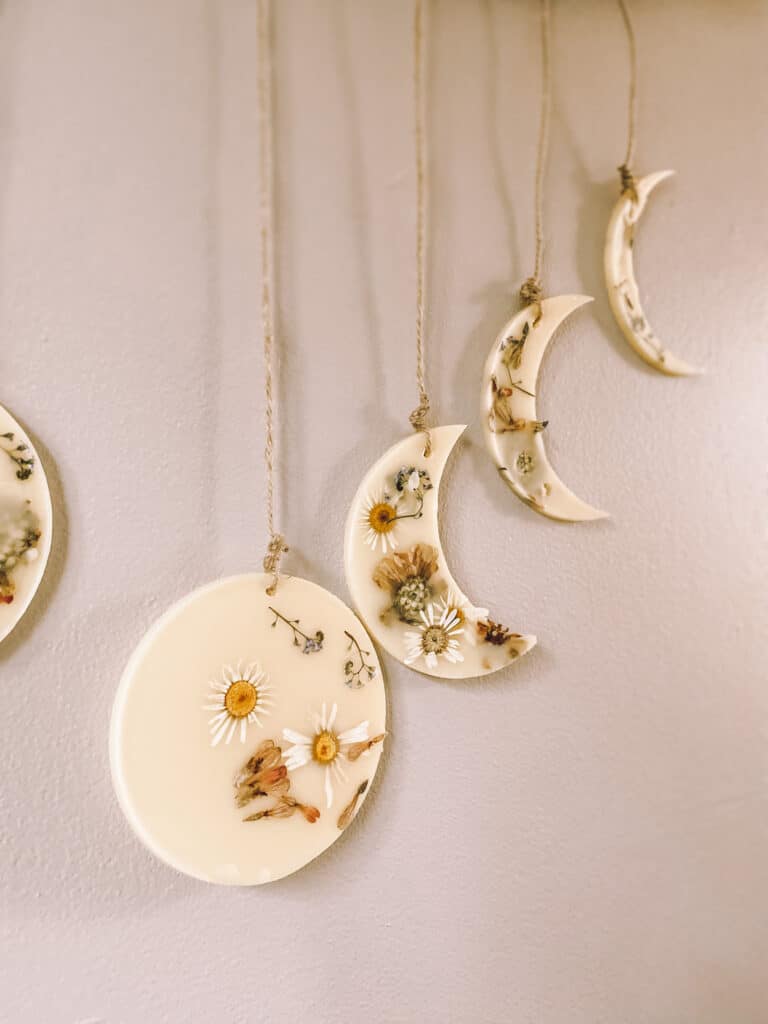
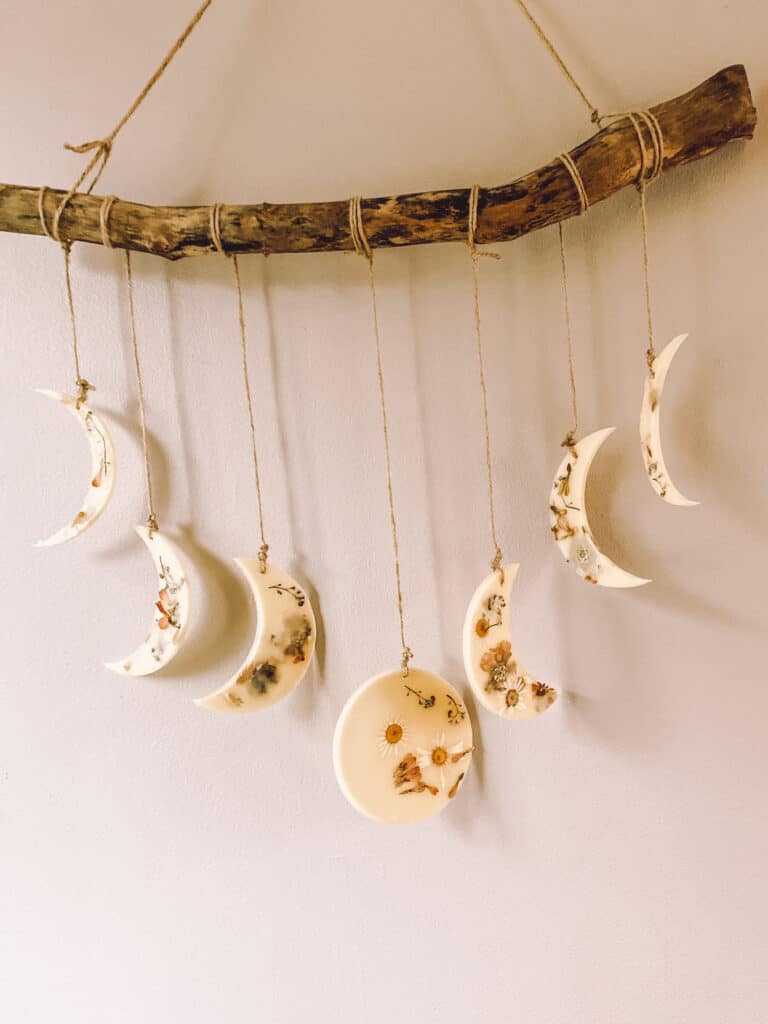
As the wax slowly hardened, I made a tiny hole where I wanted to thread through the twine to hang them. Make sure you are strategic in this! When you do the waxing moons, put the holes all on the top and for the waning moons have the holes all on the bottoms, that way when you go to hang them it, they can all curve in towards the full moon, away from the full moon (if you want!) or they will can all face the same direction when you hang them. You get to decide, just plan it out with how you hang it.
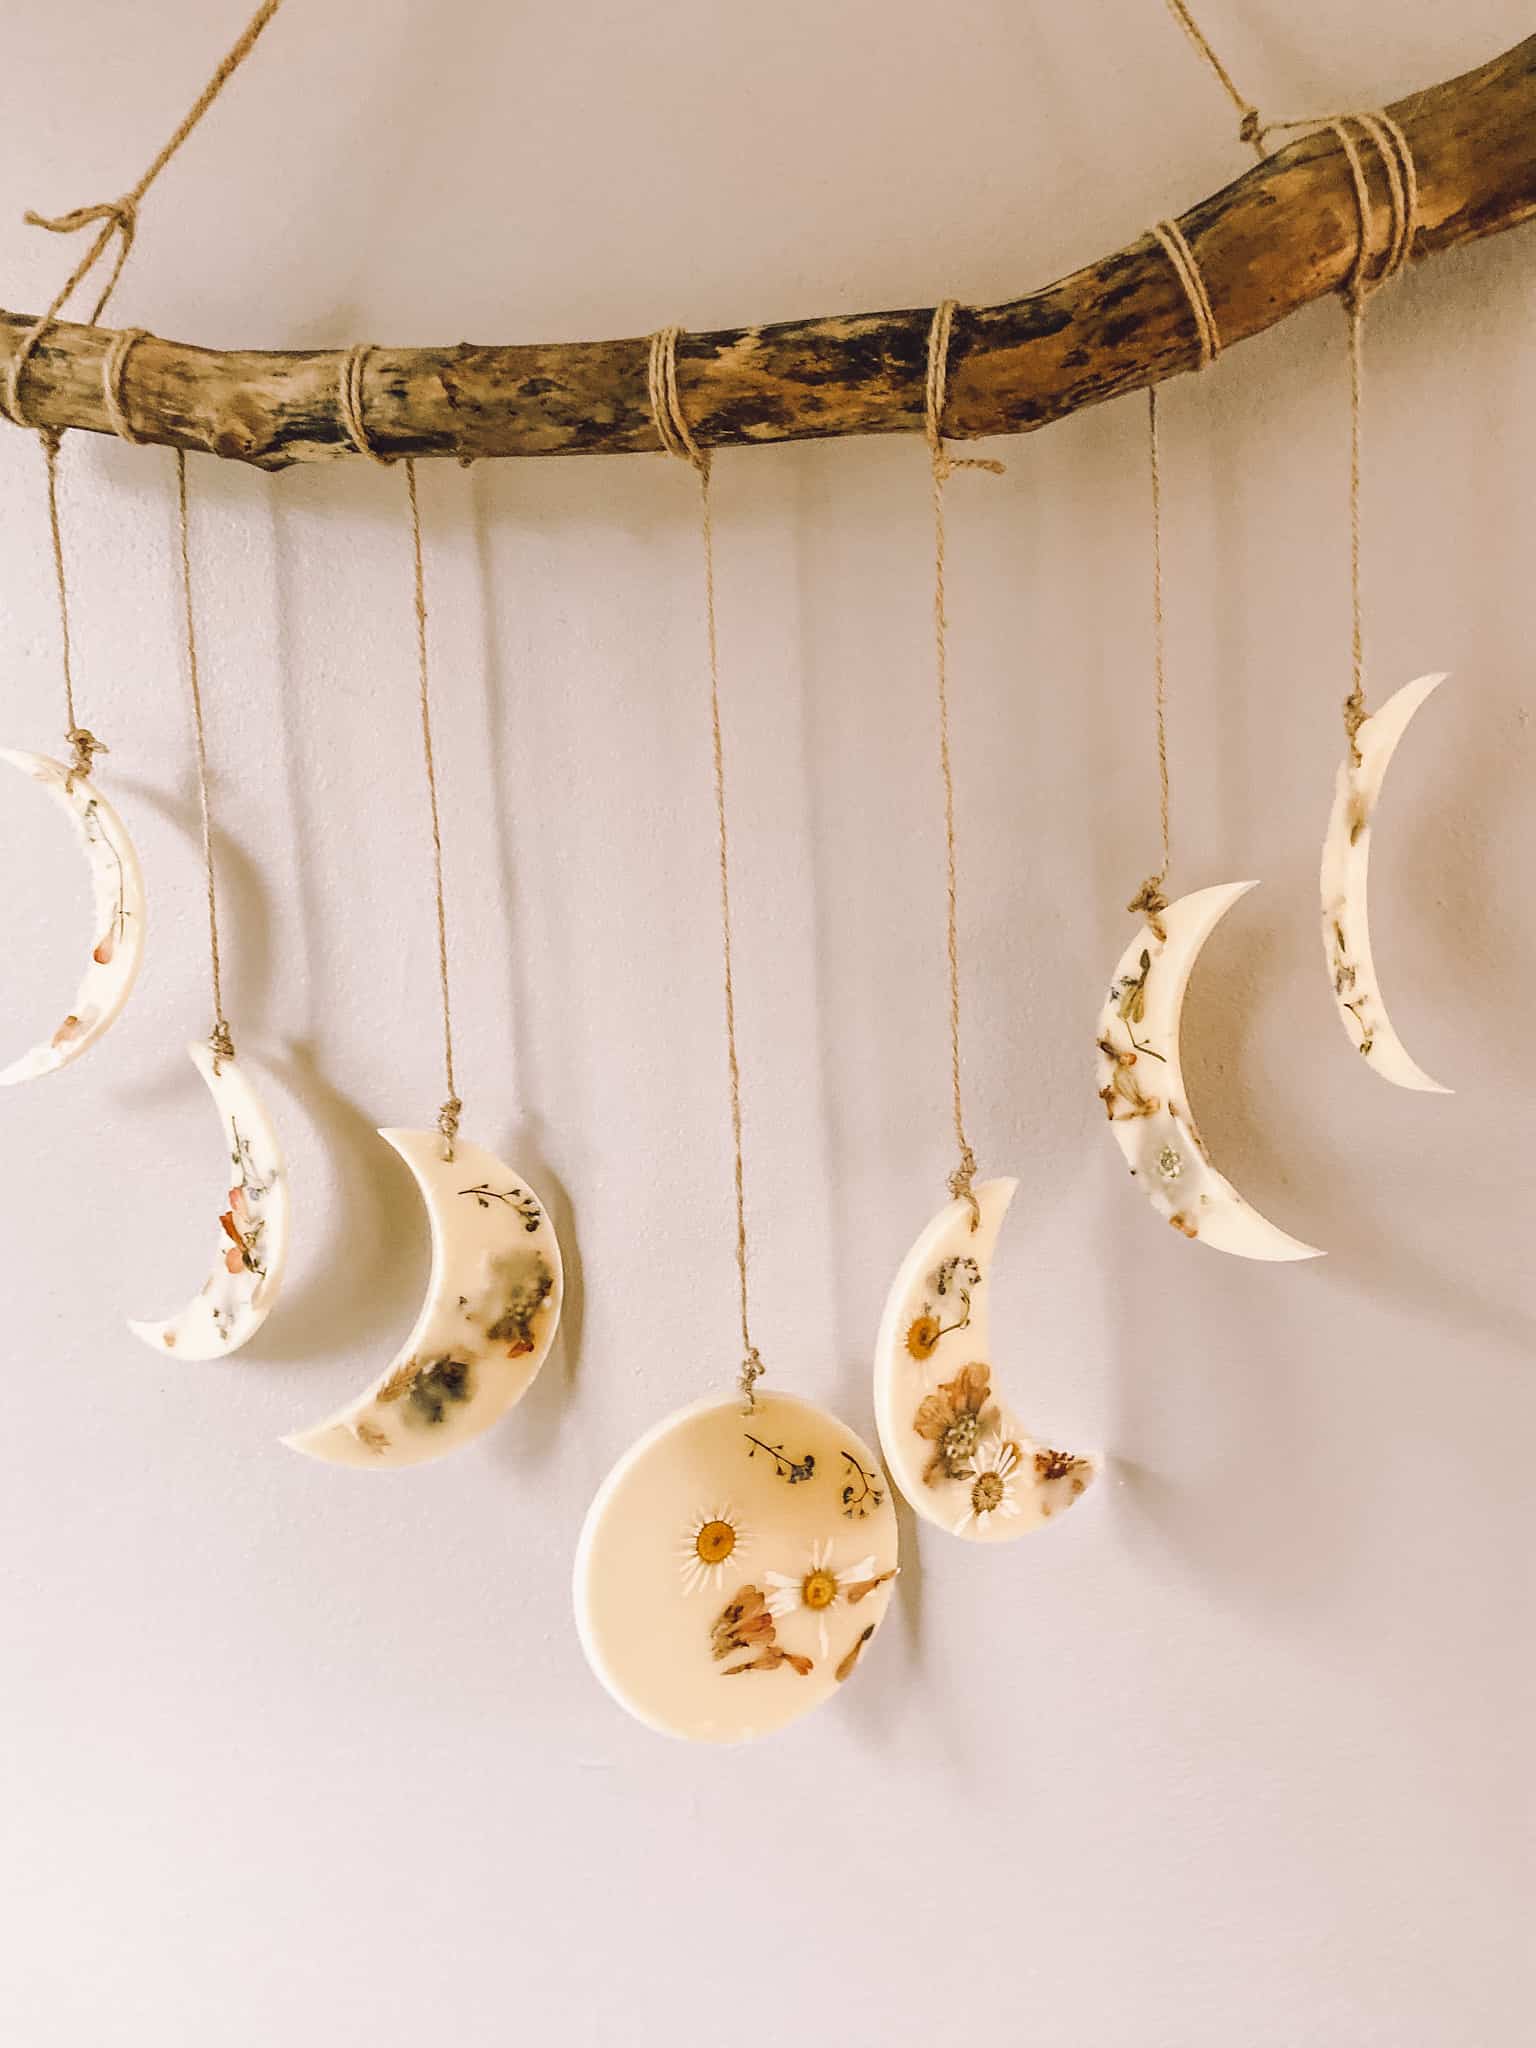
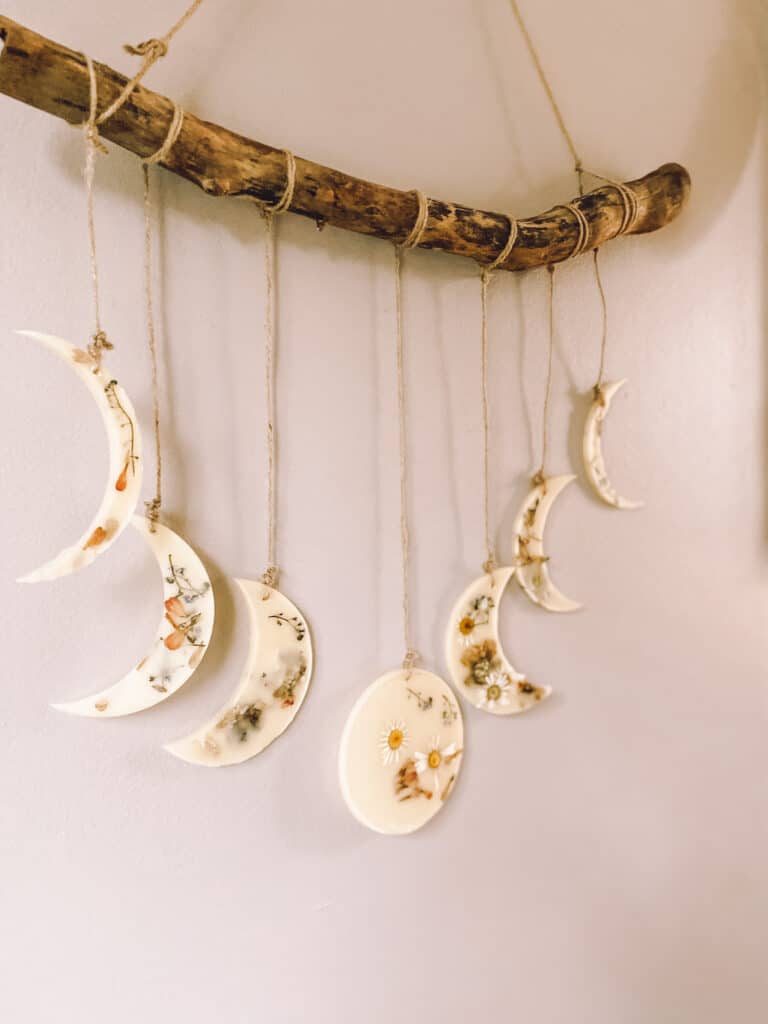
Once fully dry, carefully take them out and set them aside to hang! We used a stick from our backyard and some twine to hang it. It takes a little time and patience to hang them all and to make it as even as you can but once it’s done, it is so worth the effort. What a beautiful and special way to make memories and a gorgeous piece to hang in your home. This can become a study on the phases of the moon or the plants and bits of nature you seal into them (or both!) or it can just be a sweet wall hanging or sun catcher. No matter how you use it, I know you and your family will love it as much as we do.
Materials you will need:
- Beeswax
- Silicone Moon Mold The moon mold that I have actually has two sizes so that means I had to do the smaller waxing/waning moons two times. It has its advantages and disadvantages though because I love that I can make bigger or smaller moon phases with just this one mold but you have to do two rounds of wax pouring and decorating to get a complete phase. I also found this one though, that is just one size and has everything you need for one pouring!
- Dried Flowers
Spanish Words to Use:
Cera (seh-rah) – wax
Flores secas (floh-rehs seh-kahs) – dried flowers
Luna (loo-nah) – moon
Fases lunares (fah-sehs loo-nah-rehs) – moon phases
Luna llena (loo-nah yeh-nah) – full moon
Móvil (moh-beel) – mobile
Colgar (kohl-gahr) – to hang